How to publish your catalog on B2B Connect (supplier setup)
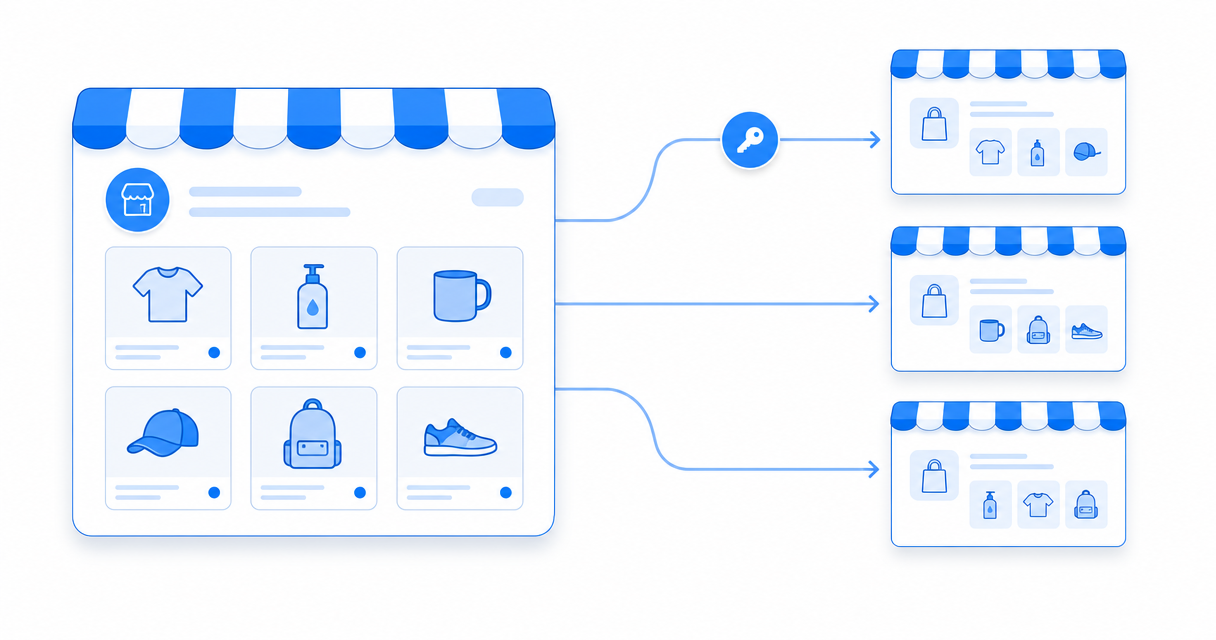
Become a supplier on B2B Connect: publish your product catalog inside easySales so other merchants can discover it, connect, and resell your products. Set your catalog profile, choose a public or private listing, share a connect code, add your logo, and manage which buyers can order from you — all from one screen.
How do I become a supplier on B2B Connect?
B2B Connect lets you publish your product catalog inside easySales so other easySales merchants can find it, connect to you, and resell your products in their own stores. You set the catalog up once as a marketplace connection, decide whether anyone can find it or only merchants you invite, and then manage your buyers from a single screen.
You don't need a separate account or a plugin. Being a supplier is a marketplace connection you add to your existing easySales account, alongside your other integrations. Buyers who connect import your products into their own catalog, keep stock and prices in step with yours, and send you the orders your products appear on.
This guide covers the supplier side — setting up and publishing your catalog. The buyer side — discovering suppliers and importing a catalog — is covered in its own chapter, linked at the end.
Step 1 — Enable B2B Connect as a supplier
In easySales, go to Integrations → Marketplaces. Find B2B Connect in the list of available marketplaces and add it, the same way you'd connect any other channel.
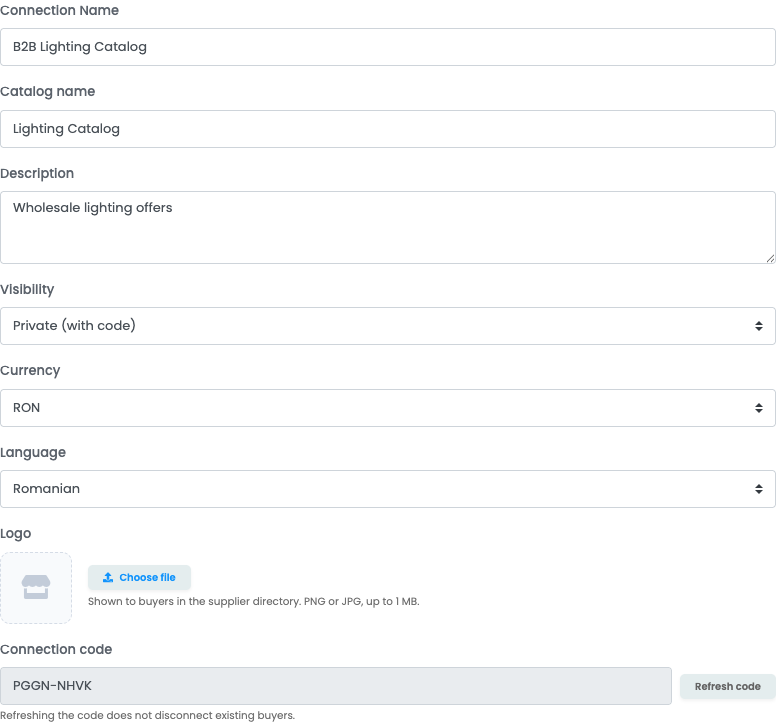
This opens the B2B Connect settings screen. Everything about your published catalog — its name, how it's listed, your logo, and your buyers — lives here. You'll fill in the catalog profile first, then save to create the connection.
Step 2 — Set up your catalog profile
Your catalog profile is what buyers see when they browse the supplier directory, so make it clear and specific. On the main settings tab you set:
- A catalog name — the title buyers see on your card in the directory. Use your brand or a descriptive catalog name, not an internal label.
- A description — a short summary of what you supply (product range, categories, any minimums). This is your pitch to prospective buyers.
- Currency — the currency your catalog prices are published in. Buyers apply their own markup on top when they import.
- Language — the language your product names and details are published in.
Your logo
Shown on your card in the supplier directory. PNG or JPG, up to 1 MB.
Catalog name & description
The title and pitch buyers read when they browse suppliers. Keep them specific.
Product count
How many products your catalog publishes, shown on your card.
Public or private badge
Tells buyers whether they can connect directly or need your connect code.
Choose the language deliberately. A buyer can only import your catalog into a store whose language matches your catalog language, so the language you pick here decides which merchants can resell your products. If you supply merchants in more than one language, pick the one that matches most of your intended buyers.
Your catalog is built from the products you already manage in easySales — you keep editing products in one place, and connected buyers receive the updates.
Step 3 — Choose public or private, and share your connect code
B2B Connect catalogs are listed one of two ways, and you decide which:
- Public — any easySales merchant can find your catalog in the supplier directory, preview your products before connecting, and connect on their own.
- Private — your catalog doesn't appear openly. A buyer can only connect if you give them your connect code, and they can't preview products until they've connected.
When your catalog is set to private, easySales generates a unique connect code for it. You'll find it on the settings screen, along with a button to refresh it. Share the code with the buyers you want to work with — for example over email — and they enter it on their side to connect.

Refreshing the code generates a new one and retires the old one, so a code you shared previously stops working. This is how you cut off future sign-ups with a leaked or outdated code. Refreshing does not disconnect buyers who already connected — existing connections stay live. To remove a buyer who's already connected, disconnect them (Step 5).
Step 4 — Upload your logo
Your logo appears on your card in the supplier directory and makes your catalog recognisable at a glance. The logo uploader appears once the connection has been created (after your first save).

Drag an image onto the upload area or click to choose a file. As easySales notes on the field, the logo is "Shown to buyers in the supplier directory. PNG or JPG, up to 1 MB." Once it uploads you'll see a "Logo uploaded successfully." confirmation, and buyers browsing the directory will see it on your catalog card. Use the same control any time to replace it.
Step 5 — Manage your connected buyers
Once your catalog is live, the connected-buyers tab is your control panel for who can resell your products. It has two views: your active buyers and your past buyers.
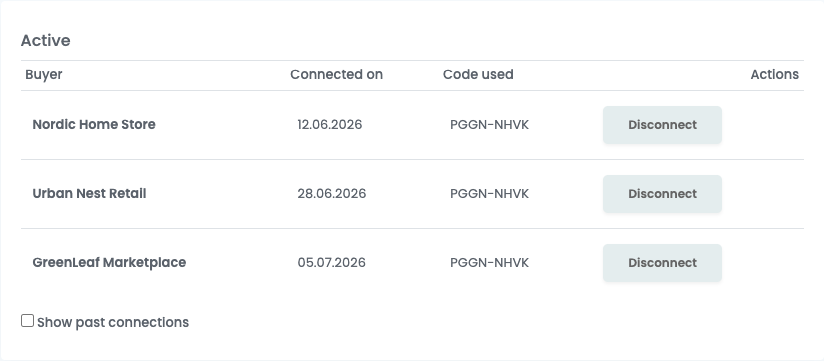
For each active buyer you can see when they connected and whether they joined through a public listing or with a connect code. Each buyer has a disconnect option. Disconnecting stops that buyer from receiving further updates and from sending you new orders on your products.
Turn on the "show past" view to see buyers who are no longer connected — with the date they disconnected and who ended the connection. This is where the reconnect option lives, and it follows one rule worth remembering.
Step 6 — What buyers see and how they order from you
Once your catalog is published, a buyer connects and runs an import wizard that copies your products into their store. They apply their own markup, choose how to match products that already share a SKU, and can opt to keep prices in step with yours — so when you change a price, their resale price updates automatically. Your published stock and prices stay the source of truth for the products they resell.
Step 7 — Receive and fulfil B2B orders
When a buyer forwards an order that includes your products, it arrives in your easySales account as a normal order under the B2B Connect marketplace — with the customer and delivery details the buyer chose to share, and the lines already mapped to your own SKUs. Your own automation flows run on it just like any other order.
Fulfil it the way you always do — generate the invoice and the AWB, or attach your own courier. What you do flows straight back to the buyer:
- Ship the order (create an AWB) and the buyer's forwarded order is marked as shipped, with your courier and tracking number shown on their side.
- Mark the order completed and it shows as fulfilled for the buyer.
- Cancel it and the buyer sees that it wasn't fulfilled.
That two-way sync is what makes B2B Connect hands-off for both sides: the buyer doesn't chase you for a tracking number, and you run everything from your own Orders screen.
That's the full supplier setup. Publish your catalog, pick public or private, add your logo, and you're discoverable — the buyer side takes it from there.
Turn your catalog into a sales channel
Publish your products to other merchants with easySales. Try it free for 14 days — no credit card required.