How to import a supplier's catalog into easySales with B2B Connect
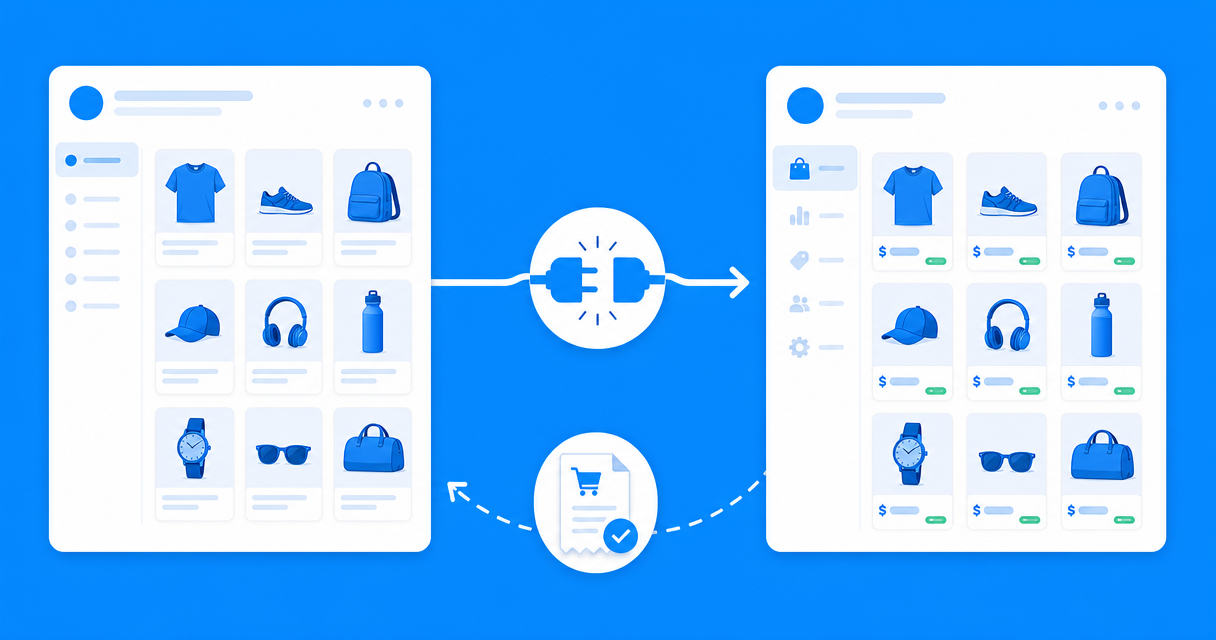
Source products from another easySales store with B2B Connect: find a supplier in the directory, connect, and import its catalog into your Virtual Shop with your own stock, markup, and SKU-matching. Keep prices synced automatically and forward orders back to the supplier to fulfill.
How do you import a supplier's catalog with B2B Connect?
B2B Connect lets you source products from another easySales store. You find a supplier in the directory, connect to it, then import its catalog into your Virtual Shop — with your own stock, pricing, and SKU-matching rules. Once imported, you can keep stock and prices synced automatically and forward the orders you receive back to the supplier to fulfill.
The whole path is: find a supplier, connect, run the import wizard, then decide how orders reach the supplier. One thing to know up front — connecting and importing are two separate steps. Connecting only adds the supplier to your account; nothing enters your catalog until you run the import wizard, so you stay in control of what gets created and how it's priced.
Step 1 — Find a supplier in the directory
Open Integrations → B2B Connect from the left menu. The directory has two tabs: the suppliers you're already connected to (shown first) and the suppliers still available to connect to. Switch to the available tab to browse new suppliers.
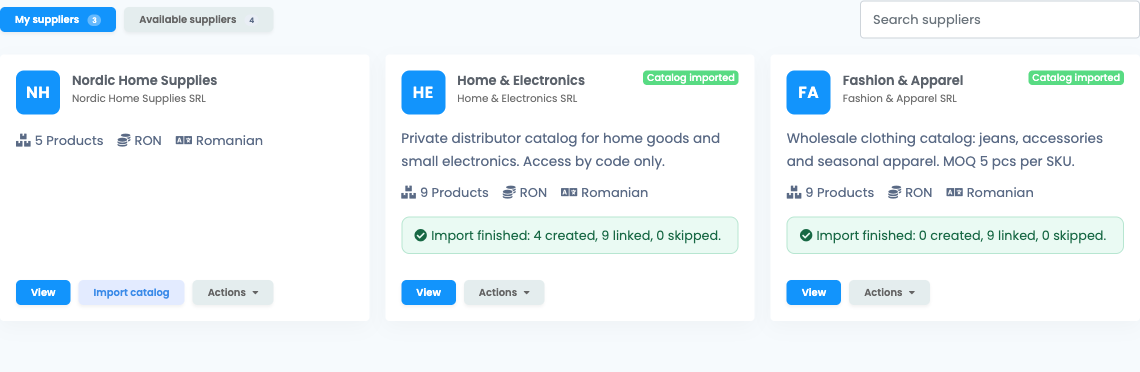
Each supplier is a card showing its logo, catalog name, the supplier's company name, how many products the catalog holds, and a short description. Use the Search suppliers box at the top to filter by supplier name, company, or description when the list gets long.
Step 2 — Preview the catalog and connect
How you connect depends on whether the supplier's catalog is public or private.
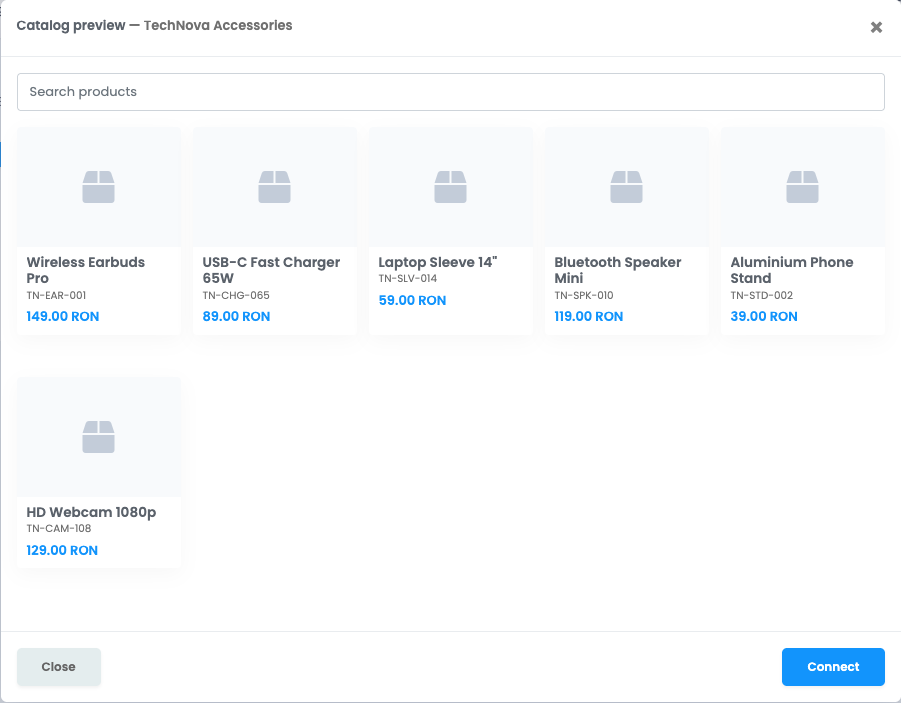
- Public catalogs are open to browse. You can preview the products before committing, then connect directly from the card or the preview.
- Private catalogs aren't previewable and don't connect on their own — the supplier gives you a connect code, and you enter that code to connect.
When you connect, easySales confirms what's about to happen: "Connecting to [supplier] adds this supplier to your account. You can then import its products into your Virtual Shop — with your own stock, pricing and SKU-matching options — from the import wizard." Confirm, and the supplier moves into your connected list.
Remember: connecting only adds the supplier. No products are imported yet — that's the next step, and it's deliberately separate so you choose exactly what comes in.
Before you import: three requirements
Importing pulls the supplier's catalog into your Virtual Shop — a store in easySales you stock and price yourself. The wizard checks three things before it will let you import, and it tells you exactly what's missing if one isn't met.
A Virtual Shop
B2B Connect imports into a Virtual Shop — a store in easySales you stock and price yourself. If you don't have one, the directory gives you a shortcut to create it.
Advanced (multi-warehouse) stock
Your Virtual Shop must have advanced stock enabled, because B2B Connect adds the supplier as an additional stock source alongside your own.
Matching language
The catalog imports in the supplier's language, so your Virtual Shop's language must match the supplier catalog language.
If you don't have a Virtual Shop yet, the directory shows a banner with a shortcut to create one. If your Virtual Shop exists but isn't set up for multi-warehouse stock, you'll see "Your Virtual Shop must have advanced (multi-warehouse) stock enabled before importing." — switch its stock to advanced first, because B2B Connect adds the supplier as one of several stock sources. And if the languages differ, you'll see "The Virtual Shop language does not match the supplier catalog language." — the catalog imports in the supplier's language, so the two must line up.
Step 3 — Run the import wizard
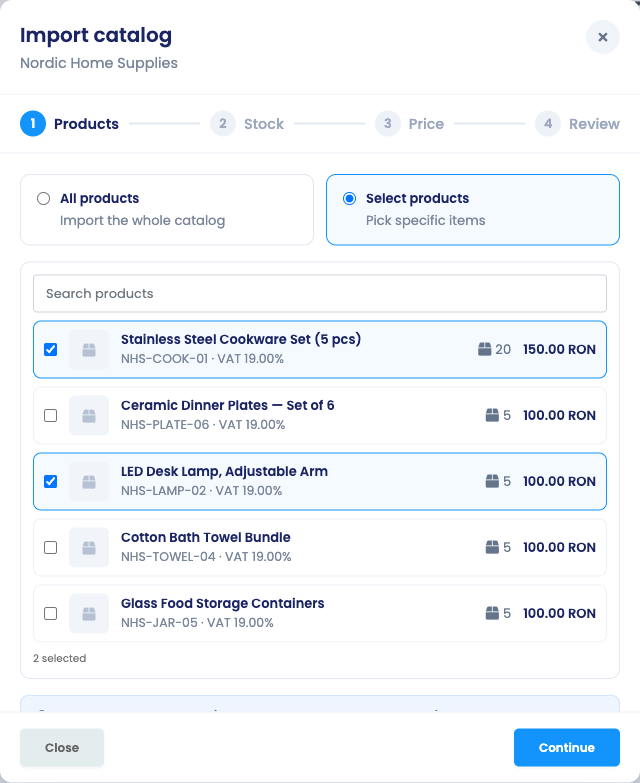
The wizard walks through four steps in order: Products, Stock, Price, and Review.
Products
Choose to import the whole catalog or pick specific products from a searchable list. This step also decides what happens when a product you're importing shares a SKU with something already in your Virtual Shop. A note at the top makes the rule clear:
"New catalog products (SKUs not yet in your Virtual Shop) are created there automatically. The options below apply only when a product with the same SKU already exists."
Under When a product with the same SKU already exists, you pick Match the existing product (the default) or Skip the product. More on that choice below.
Stock
Leave Connect stock on (its default) to bring the supplier's stock into your Virtual Shop. As the hint explains, this "creates a supplier warehouse as an additional stock source for your Virtual Shop" — it's an extra source alongside anything you already stock, never a replacement. Turn it off if you'd rather manage stock for these products yourself.
Price
Set a Markup (%) to add your margin on top of the supplier's price. The markup applies both to the products created now and, if you keep prices synced, to future price changes from the supplier. The wizard shows a live example so you can see the resulting price before you commit.
Tick Keep prices synced to have easySales re-price your imported products automatically whenever the supplier changes a price. This is what turns a one-time import into a hands-off sourcing relationship.
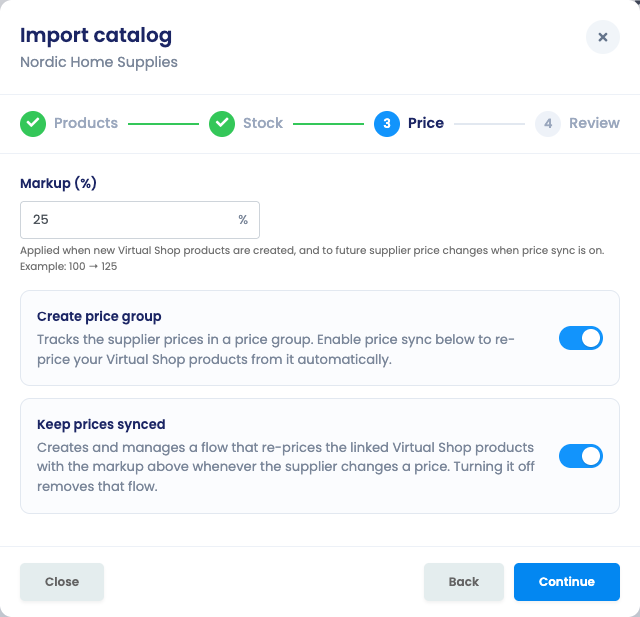
Review
The last step summarizes your choices — which products, your SKU strategy, whether stock is connected, your markup, and whether prices stay synced — and tells you whether a managed price-sync flow will be created (or removed). Start the import and it runs in the background; the directory shows progress and, when it's done, a count of how many products were created, linked, and skipped.
New products vs existing SKUs
New SKUs — products the supplier has that your Virtual Shop doesn't — are always created for you. The Match-vs-Skip choice only matters when a SKU already exists in your shop.
Match is the right default for most stores: it keeps a single product per SKU and lets connected stock and price updates flow to the product you already sell. Skip is useful when you deliberately manage certain SKUs yourself and don't want B2B Connect to touch them.
Keep prices synced
When you tick Keep prices synced, easySales sets up and maintains an Automation Flow for you. Whenever the supplier changes a product's price, that flow re-prices the linked products in your Virtual Shop using the markup you chose — so your selling prices track your cost without any manual work.
You don't build or maintain this flow by hand. easySales creates it when you turn the option on, updates it when you change your markup, and removes it if you turn syncing off. You can always open it from the connection overview to see exactly what it does.
Forward orders to your supplier
Sourcing is only half the story — when a customer buys one of these products, the order needs to reach the supplier. You do that with a SendOrder automation flow that targets the B2B Connect connection. Build a flow that sends qualifying orders to the supplier, and easySales forwards each one automatically; if an order contains nothing sourced from that supplier, the flow skips it.
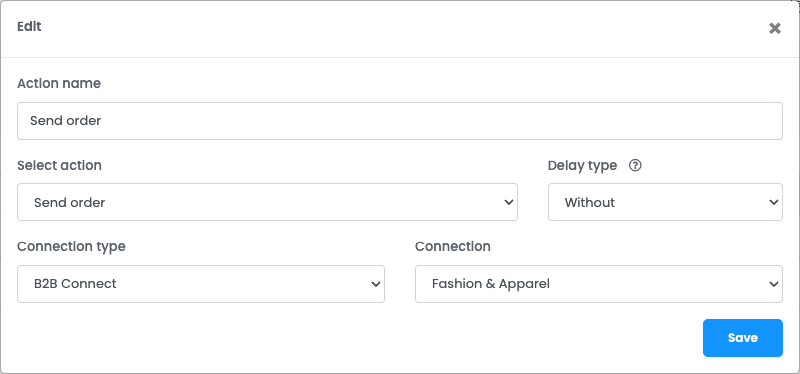
You can also forward a single order by hand: open the order, expand its Order submissions panel, and choose your B2B Connect supplier. easySales previews exactly which lines are eligible — and flags any that belong to a different supplier or that you fulfil yourself — before you send.
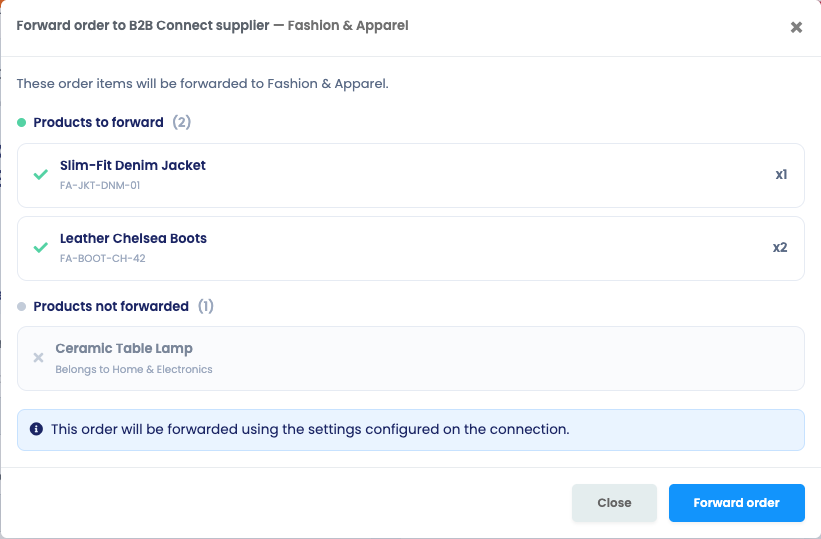
Either way, the contact details sent to the supplier — the customer's, or a fixed contact you define — come from the connection's order-forwarding settings, so you set that once and it applies to every forwarded order.
Track your forwarded orders
A forwarded order becomes an order submission on that order, so you always know what was sent and where it stands. Open the order's Order submissions panel to see the B2B Connect entry: the supplier's order id, its current status, and — once the order ships — the courier, tracking number, and shipping label pulled back from the supplier.
Only the products sourced from that supplier are forwarded. If an order mixes products from several suppliers — or products you fulfil yourself — B2B Connect sends just the matching lines to each supplier, rewritten to that supplier's own SKUs. Your order is never split; anything that isn't sourced from a connected supplier stays with you.
The status travels both ways. When the supplier ships or completes the order, your submission updates and the courier and tracking appear on your side; if the supplier can't fulfil it and cancels, the submission is marked so you can see it wasn't shipped. To cancel a forwarded order yourself, add a SendOrder flow step set to the cancel operation — with status forwarding enabled on the connection — and the cancellation is sent to the supplier.
Manage the connection
Open a connected supplier to reach everything the connection created and controls.
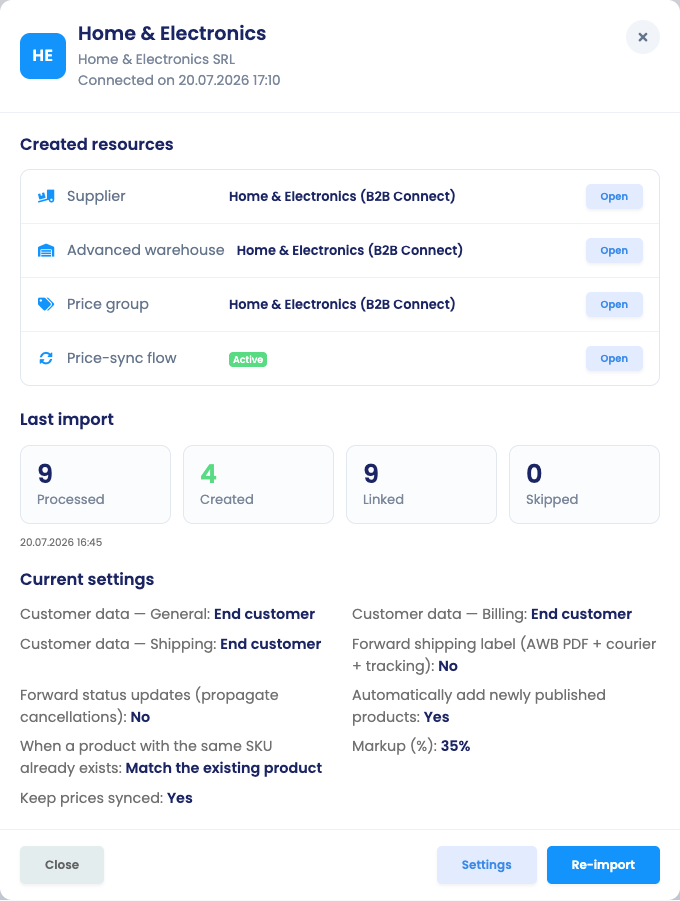
- Overview lists the resources B2B Connect created for you — the supplier record, the advanced warehouse, the price group, and the price-sync flow — each with an Open link, plus the stats from your last import.
- Settings is where you set order-forwarding contact details and your import preferences (whether newly published supplier products are added automatically, and your default SKU-matching strategy).
- Re-import pulls the catalog again with your saved options; Disconnect ends the relationship.
Once your supplier is connected, imported, and priced, you have a self-maintaining sourcing channel: stock and prices stay current, and orders route to the supplier for fulfillment — all from your easySales dashboard.
Source and sell without touching a spreadsheet
Try easySales free for 14 days. No plugin, no credit card, no code.