How to count stock and transfer it between warehouses in easySales
Run an inventory count in an advanced warehouse, correct the differences, and move stock between warehouses with a transfer.
What counts and transfers do
Two screens keep the stock of your advanced warehouses right: Inventory check compares what is on the shelves with what easySales has, and corrects the difference; Transfers moves stock from one warehouse to another. Both are under Stocks & warehouses → Warehouse stocks.
Three things to know first:
- The correction lasts only where easySales owns the stock. On a Manual warehouse, a count or a transfer stays. A warehouse whose stock comes from another system, such as your invoicing or ERP software, a feed or a supplier, gets that system's quantities again at its next update. Correct those in the system they come from.
- Finalizing a count can change your stock. With Apply discrepancies to warehouse stock ticked, each product with a difference gets the quantity you counted as its new stock.
- A transfer moves the stock at once. Do transfer takes the quantities out of the source warehouse and adds them to the destination right away. There is no in-transit step.
Both screens work with advanced warehouses that do not track batches.
Count your stock
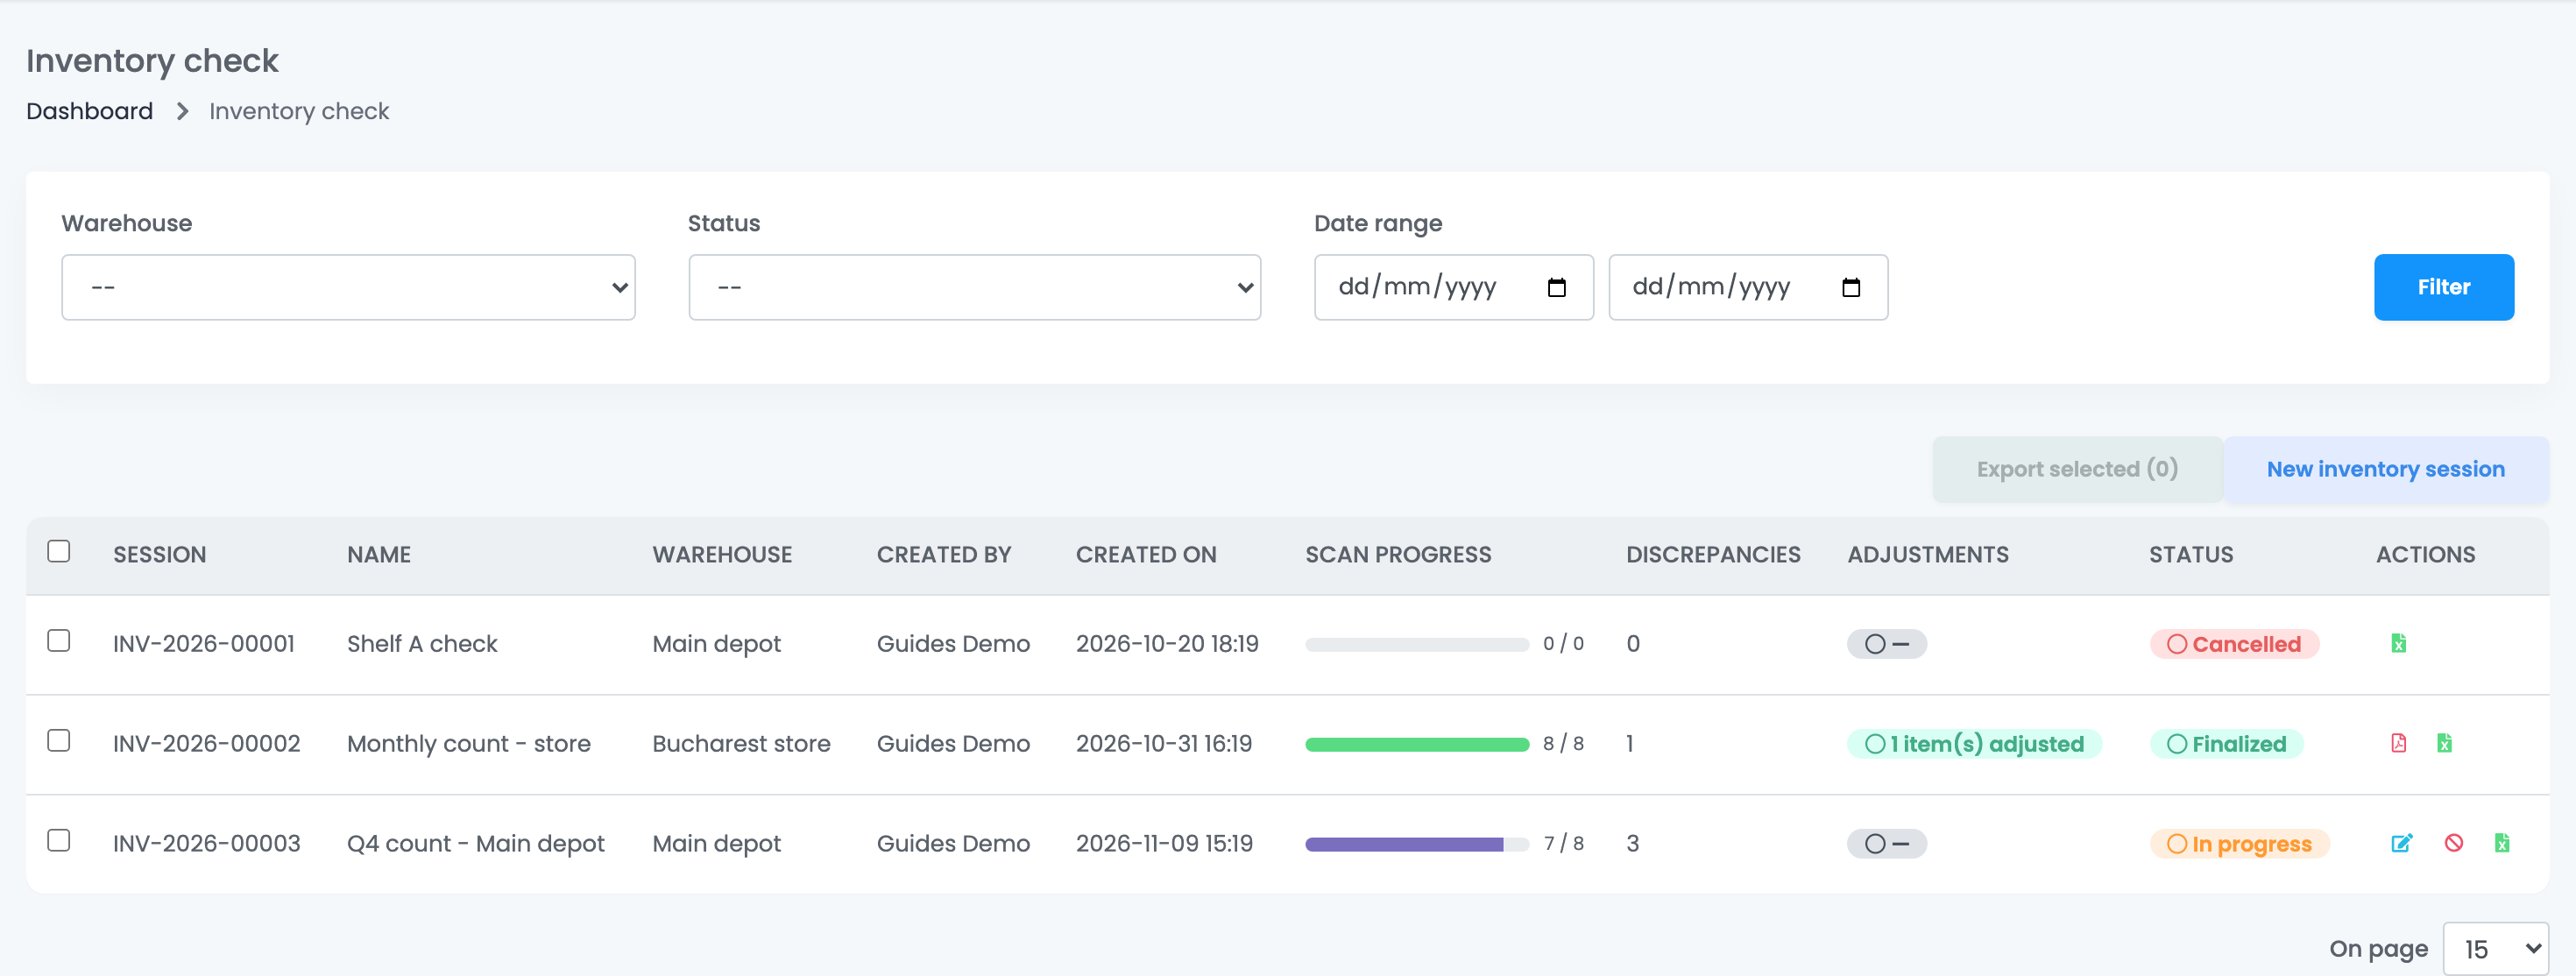
Inventory check lists your count sessions with their progress, the number of discrepancies, whether the stock was adjusted, and their status: In progress, Finalized or Cancelled. Export downloads a session as an Excel file; a finalized session also has its PDF report.
Start a session
- Press New inventory session.
- Give it a Name and choose the Warehouse. A session works on one warehouse.
- Optionally, set a Discrepancy tolerance: a difference up to this number still counts as OK. It cannot be changed once products are counted.
- Choose the Products included in the session.
- Choose who is Responsible for the count, add Notes if you want, and press Create and start scanning.
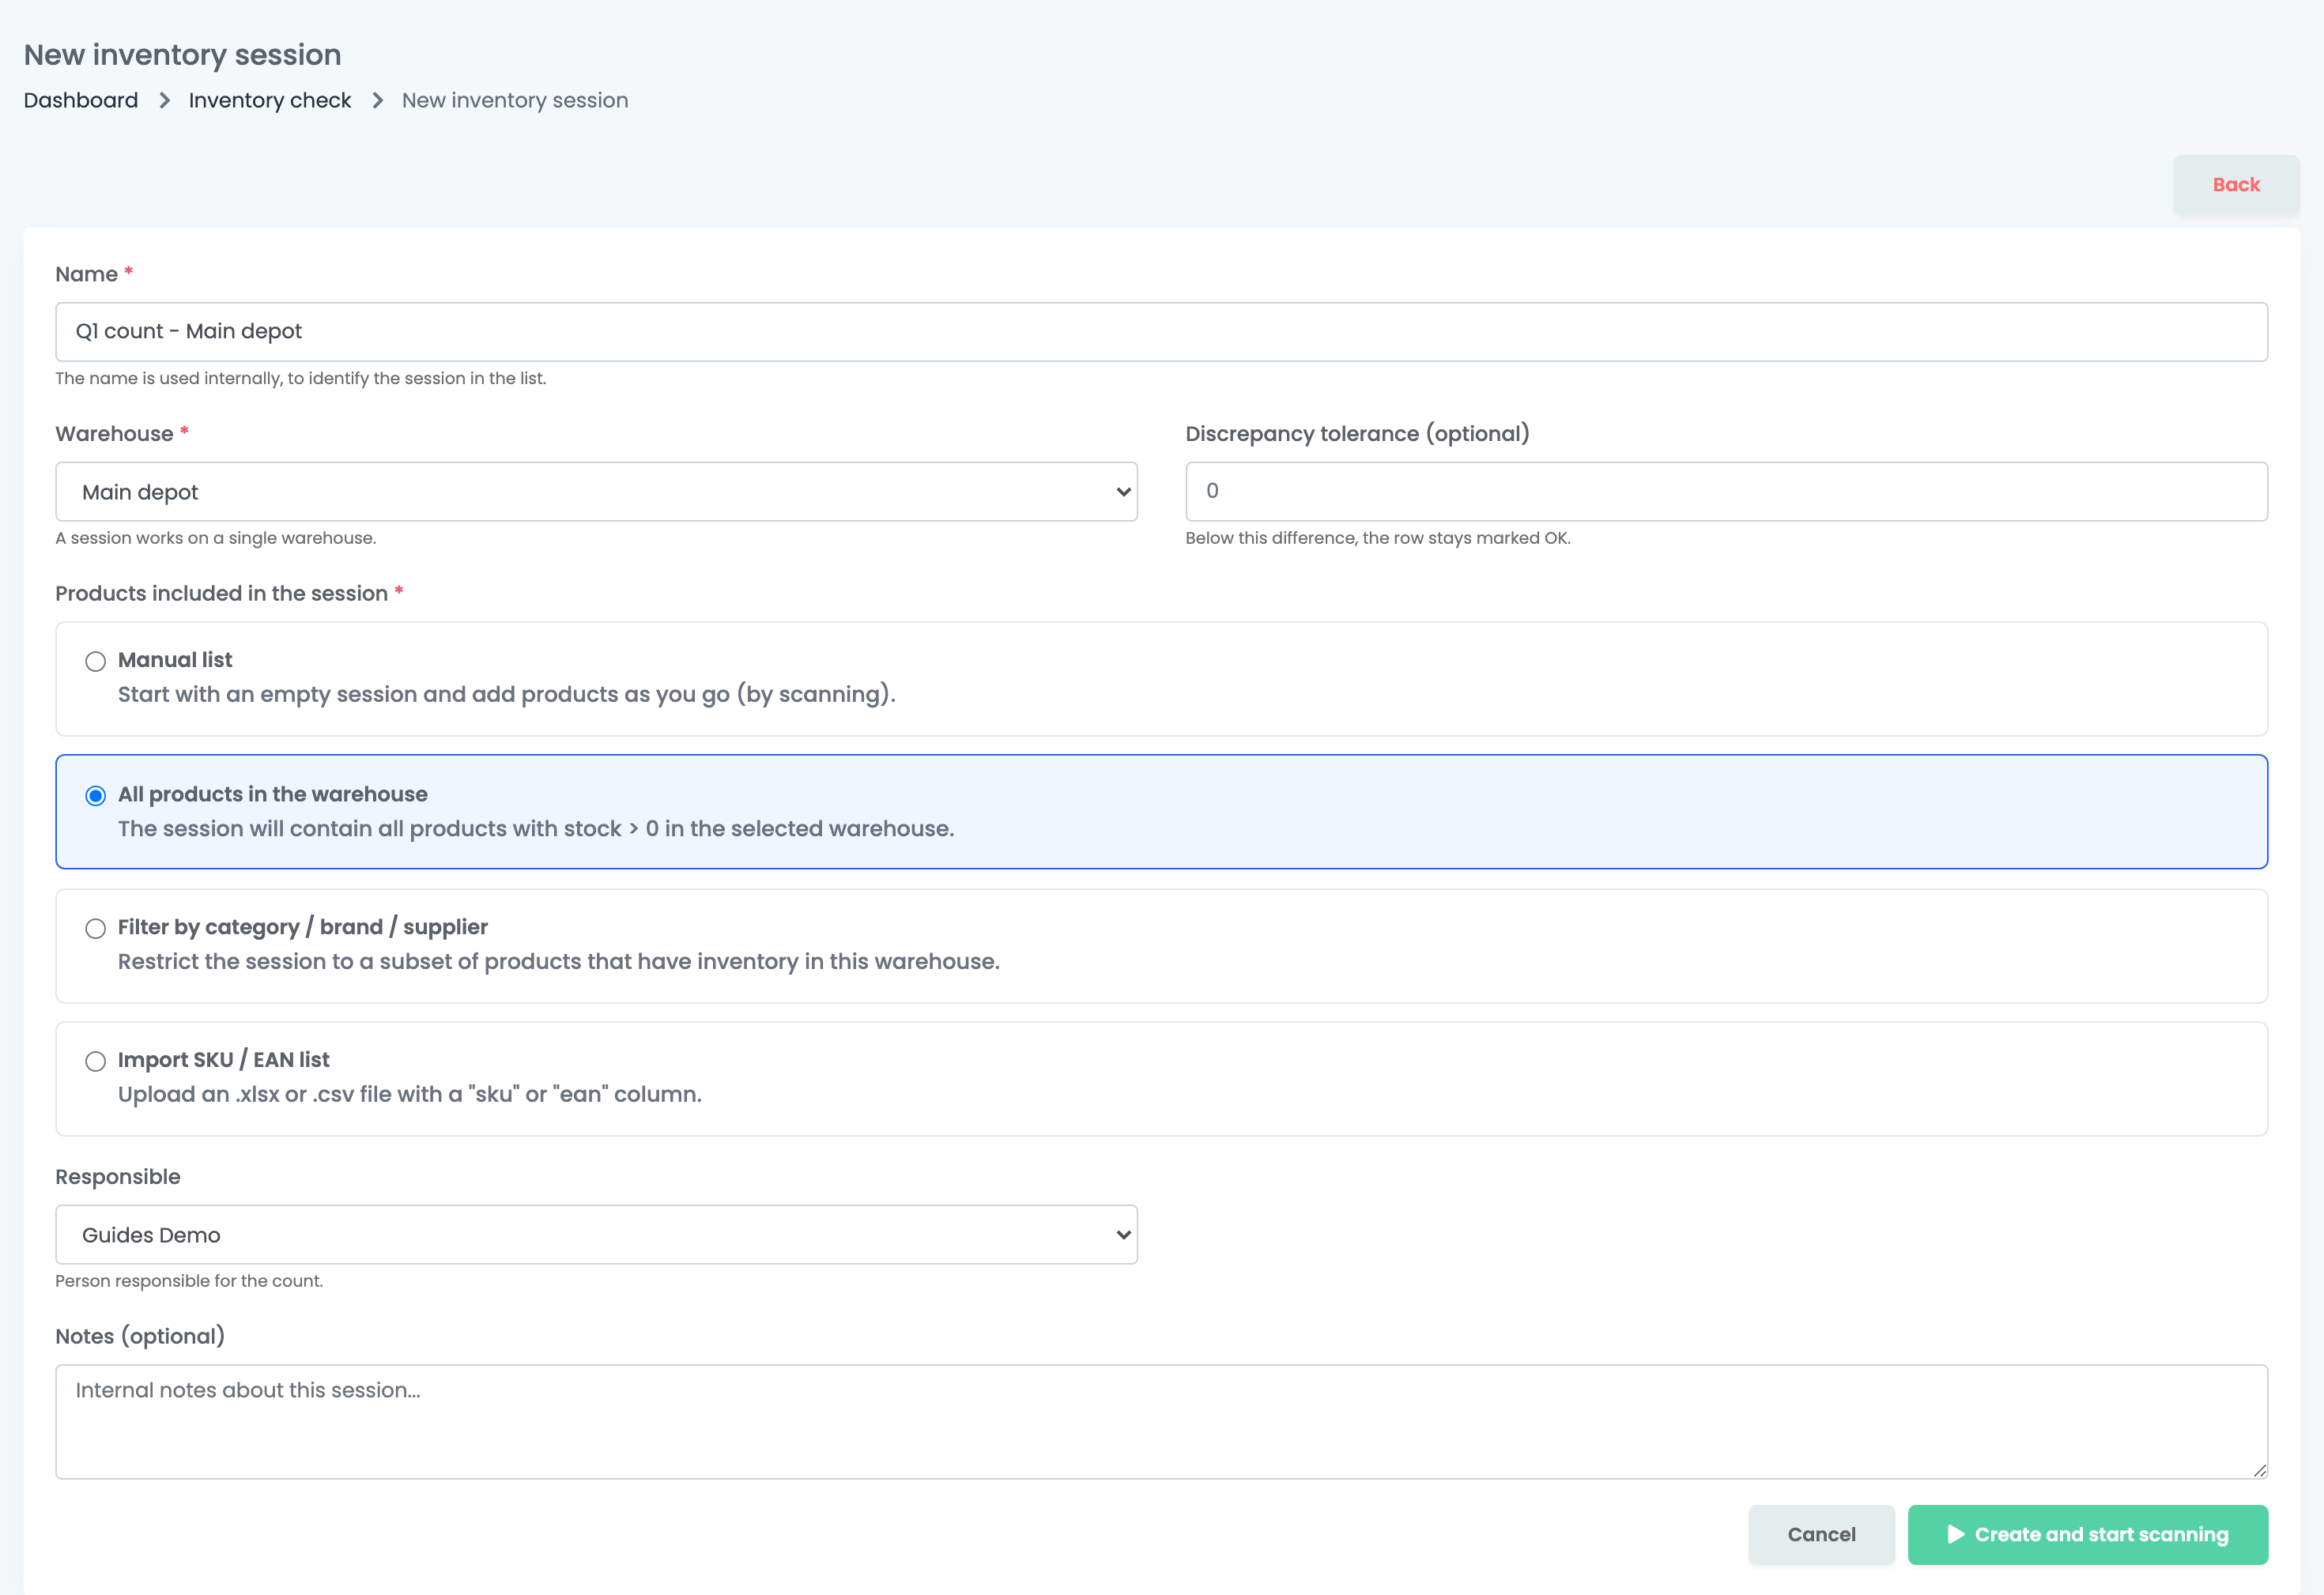
| Option | What the session starts with |
|---|---|
| Manual list | Nothing. Products are added as you scan them. |
| All products in the warehouse | Every product with stock above 0 in the warehouse. |
| Filter by category / brand / supplier | The products of the warehouse in the categories, brands or suppliers you pick. |
| Import SKU / EAN list | The products listed in an .xlsx or .csv file with a "sku" or "ean" column. |
Count the products
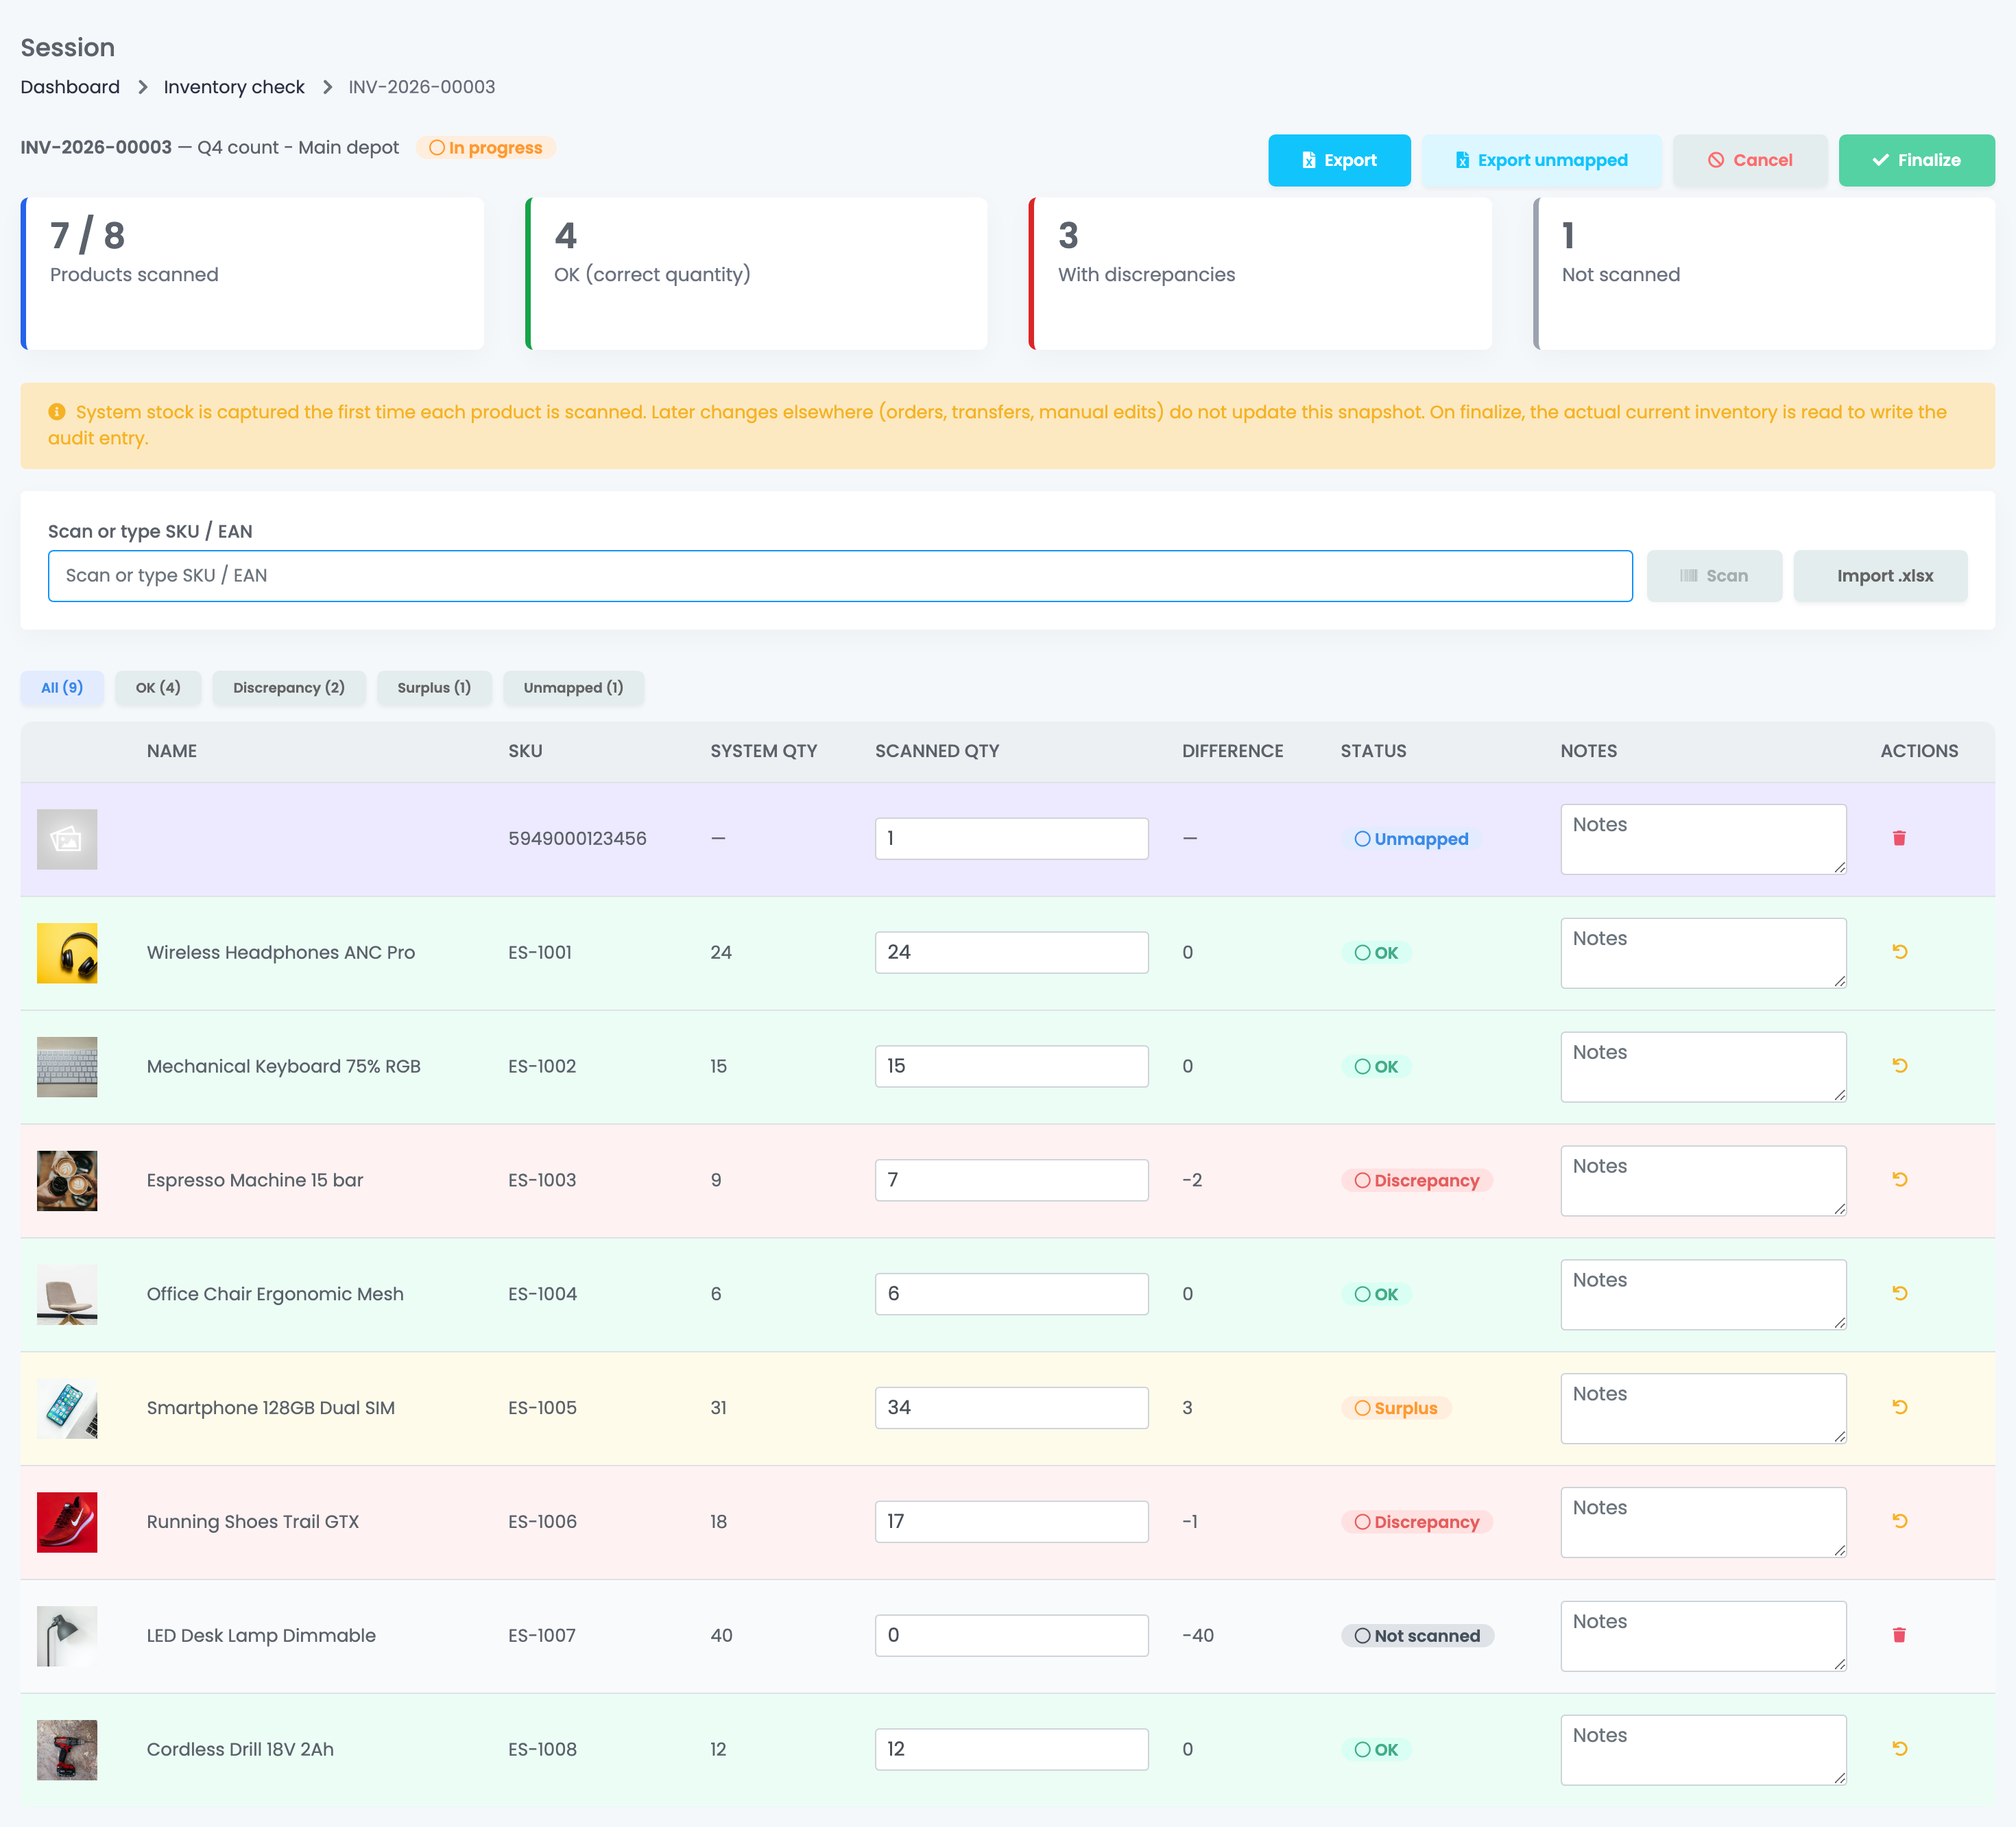
Scan each product, or type its SKU or EAN in Scan or type SKU / EAN and press Scan. Each scan adds 1 to Scanned qty; you can also type the quantity in the row. Import .xlsx adds counted products from a file, up to 100 rows at a time.
The row shows the System qty, the Difference and a status: OK, Discrepancy (fewer than in easySales), Surplus (more), Not scanned, or Unmapped for a code that is not stocked in this warehouse. A product of this warehouse that was not in the session is added when you scan it.
Finalize the count
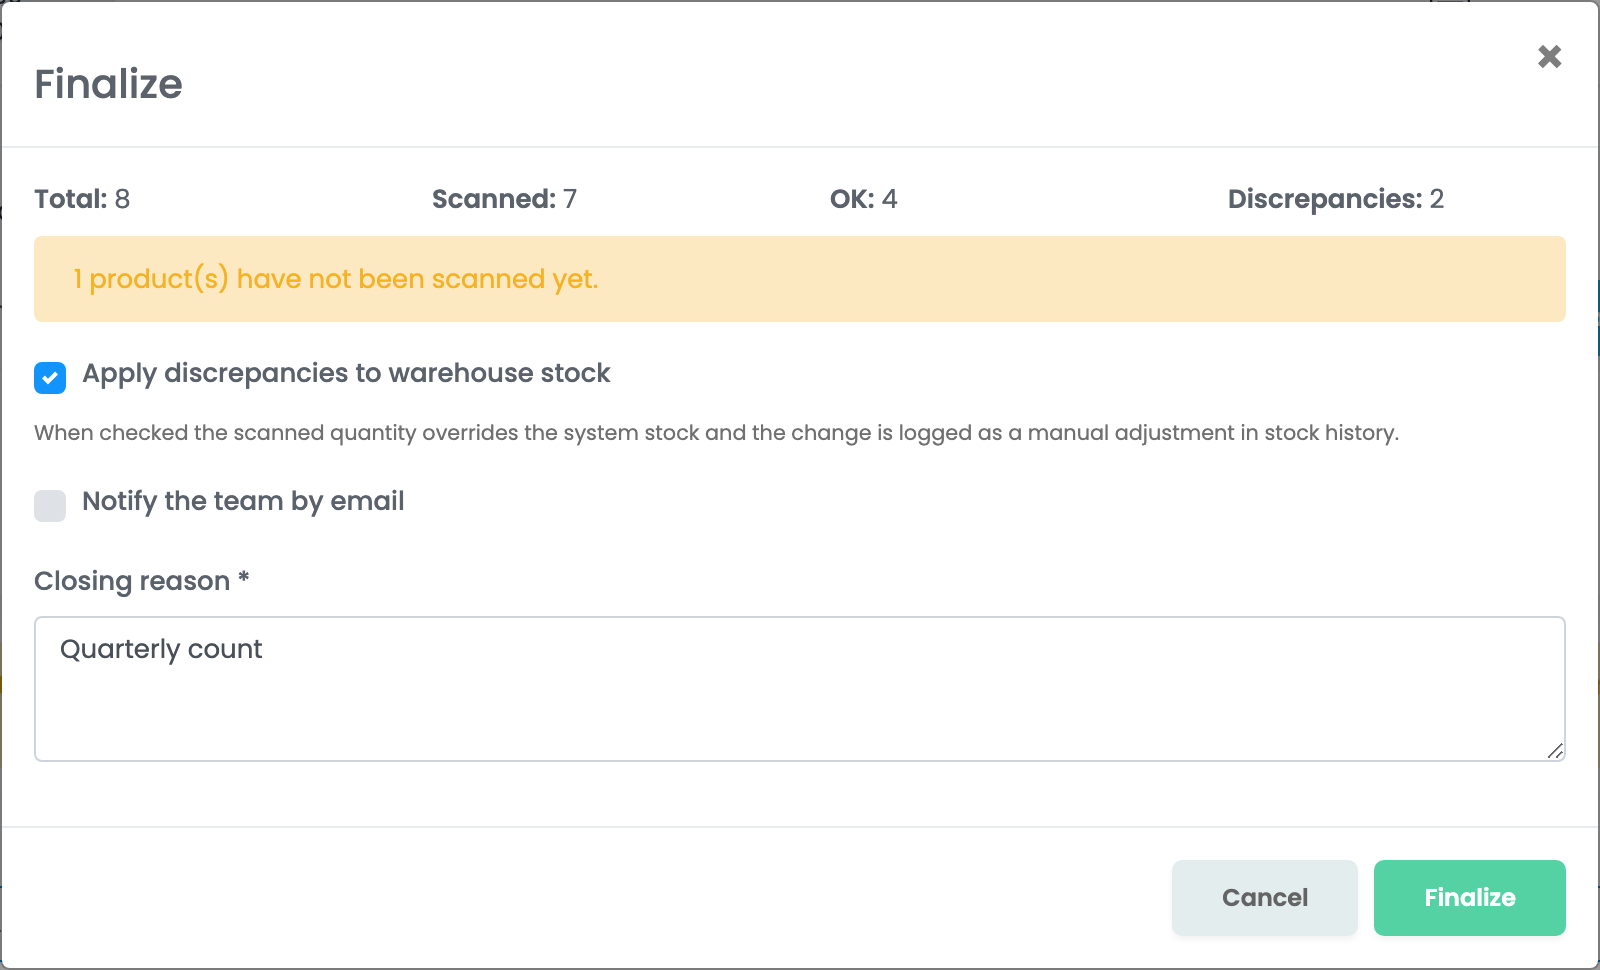
Press Finalize when the count is done. The window shows the totals and how many products were not scanned.
- Apply discrepancies to warehouse stock (ticked by default) sets the stock of every Discrepancy and Surplus product to the quantity you counted, and records it as a manual adjustment in the stock history. Products that are OK, Not scanned or Unmapped keep their stock, and reserved stock is not changed. Untick it to keep the count as a record only.
- Notify the team by email sends the summary, with the PDF report attached, to you and your team members.
- Closing reason is required.
The shops and marketplaces that sell from this warehouse then get the new stock. A finalized or cancelled session cannot be reopened.
Move stock between warehouses
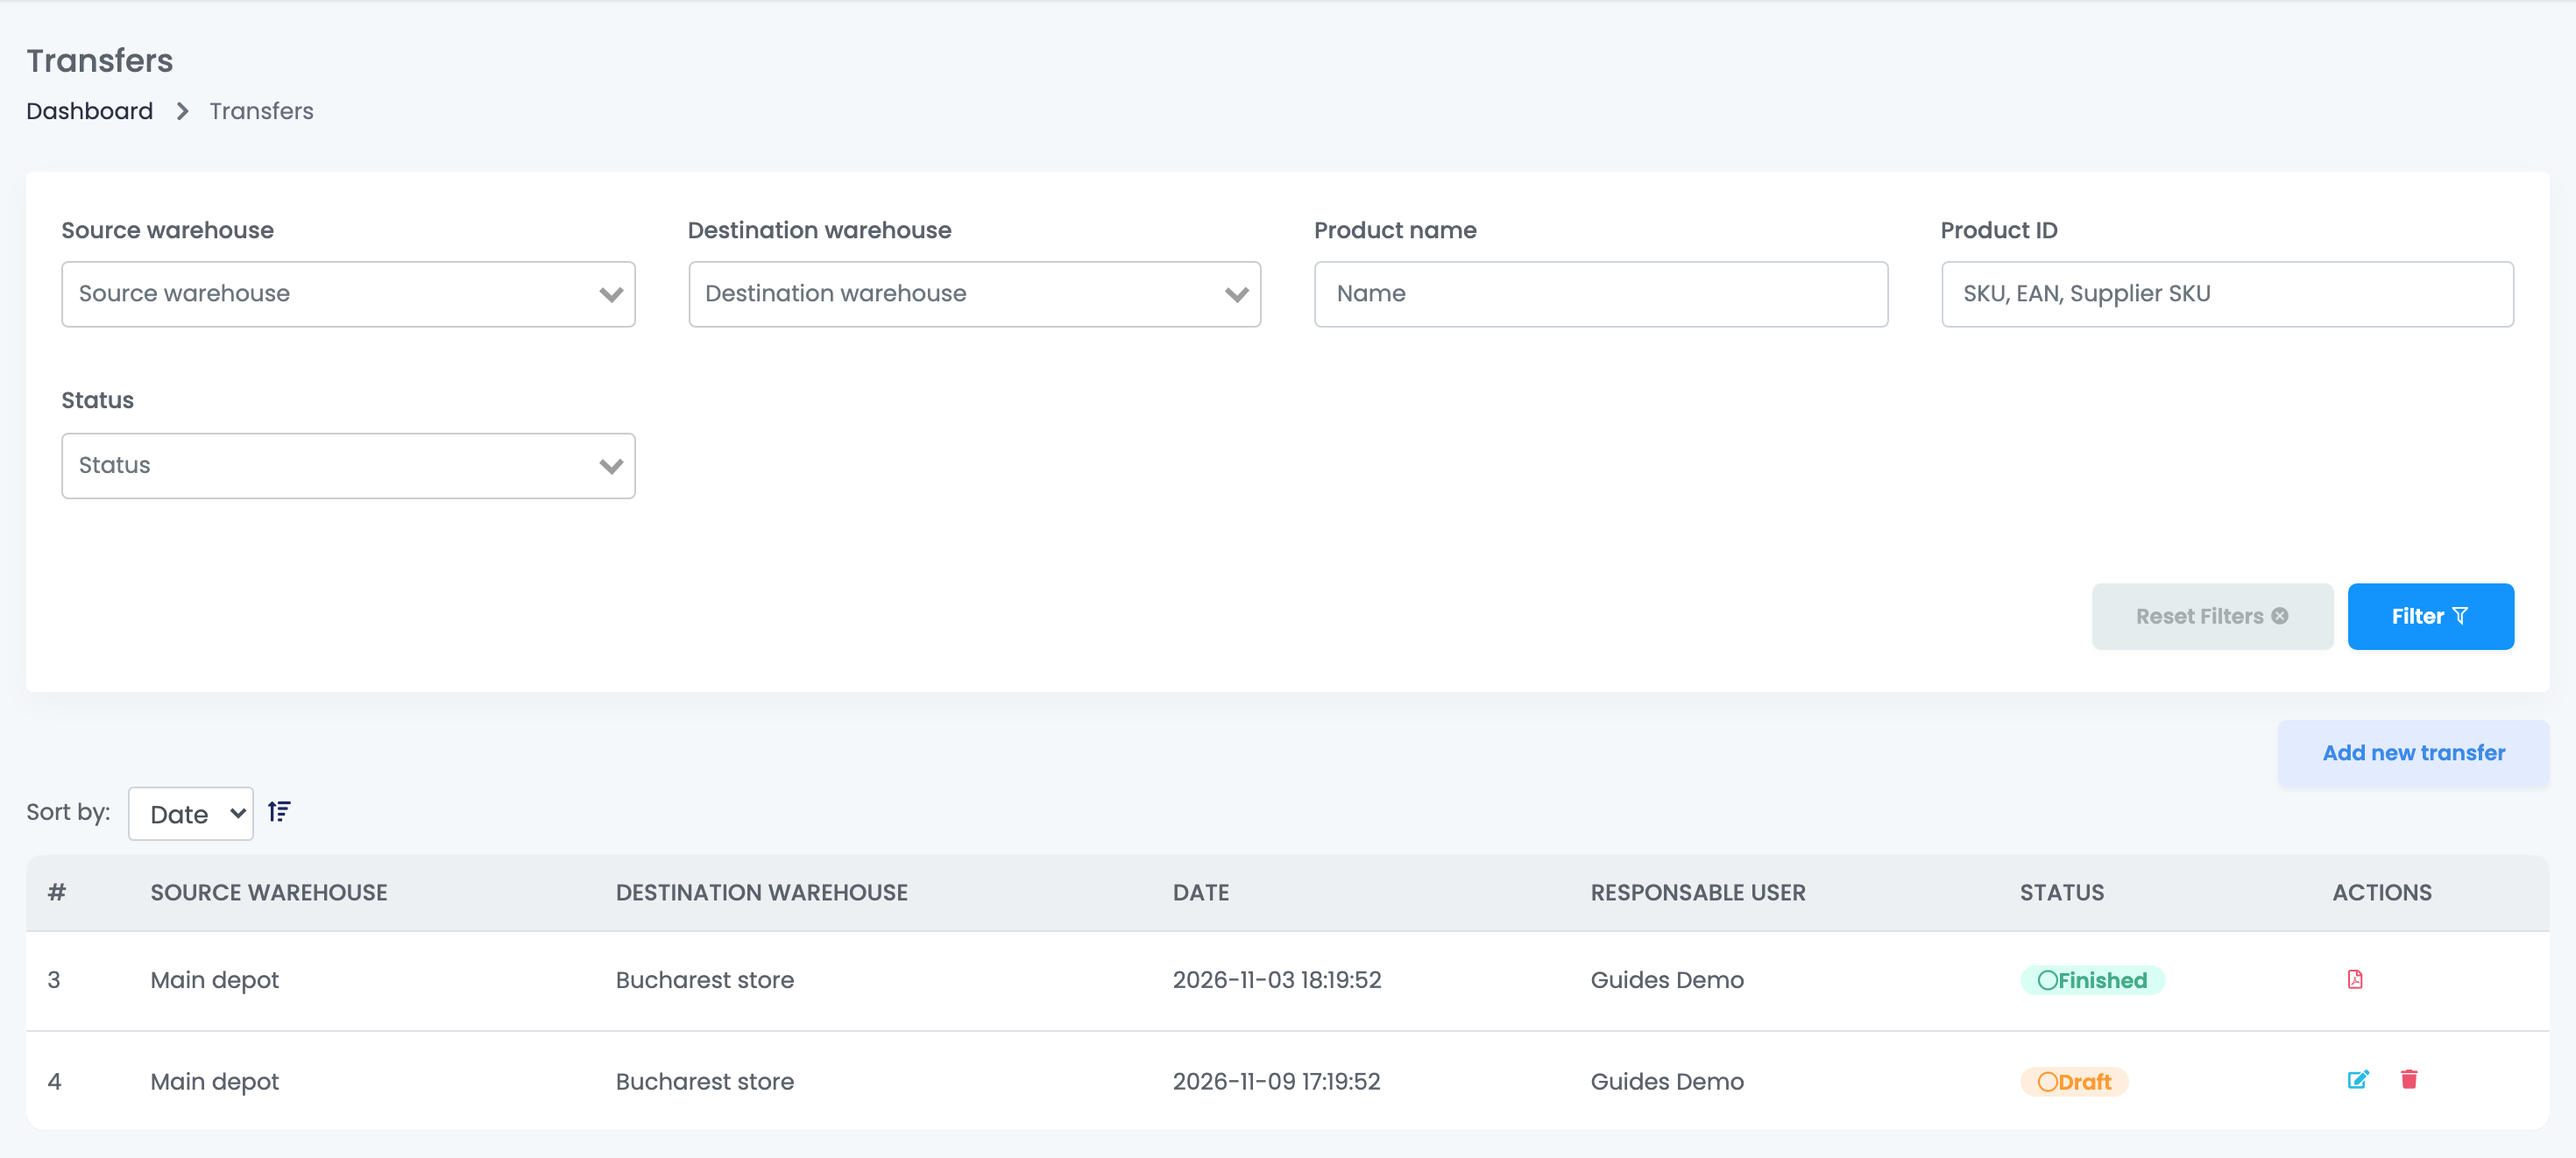
Transfers lists your transfers with their source and destination warehouse, the person responsible and their status, Draft or Finished. A finished transfer has a PDF report with the products and signature boxes for the person who gives and the one who receives the goods.
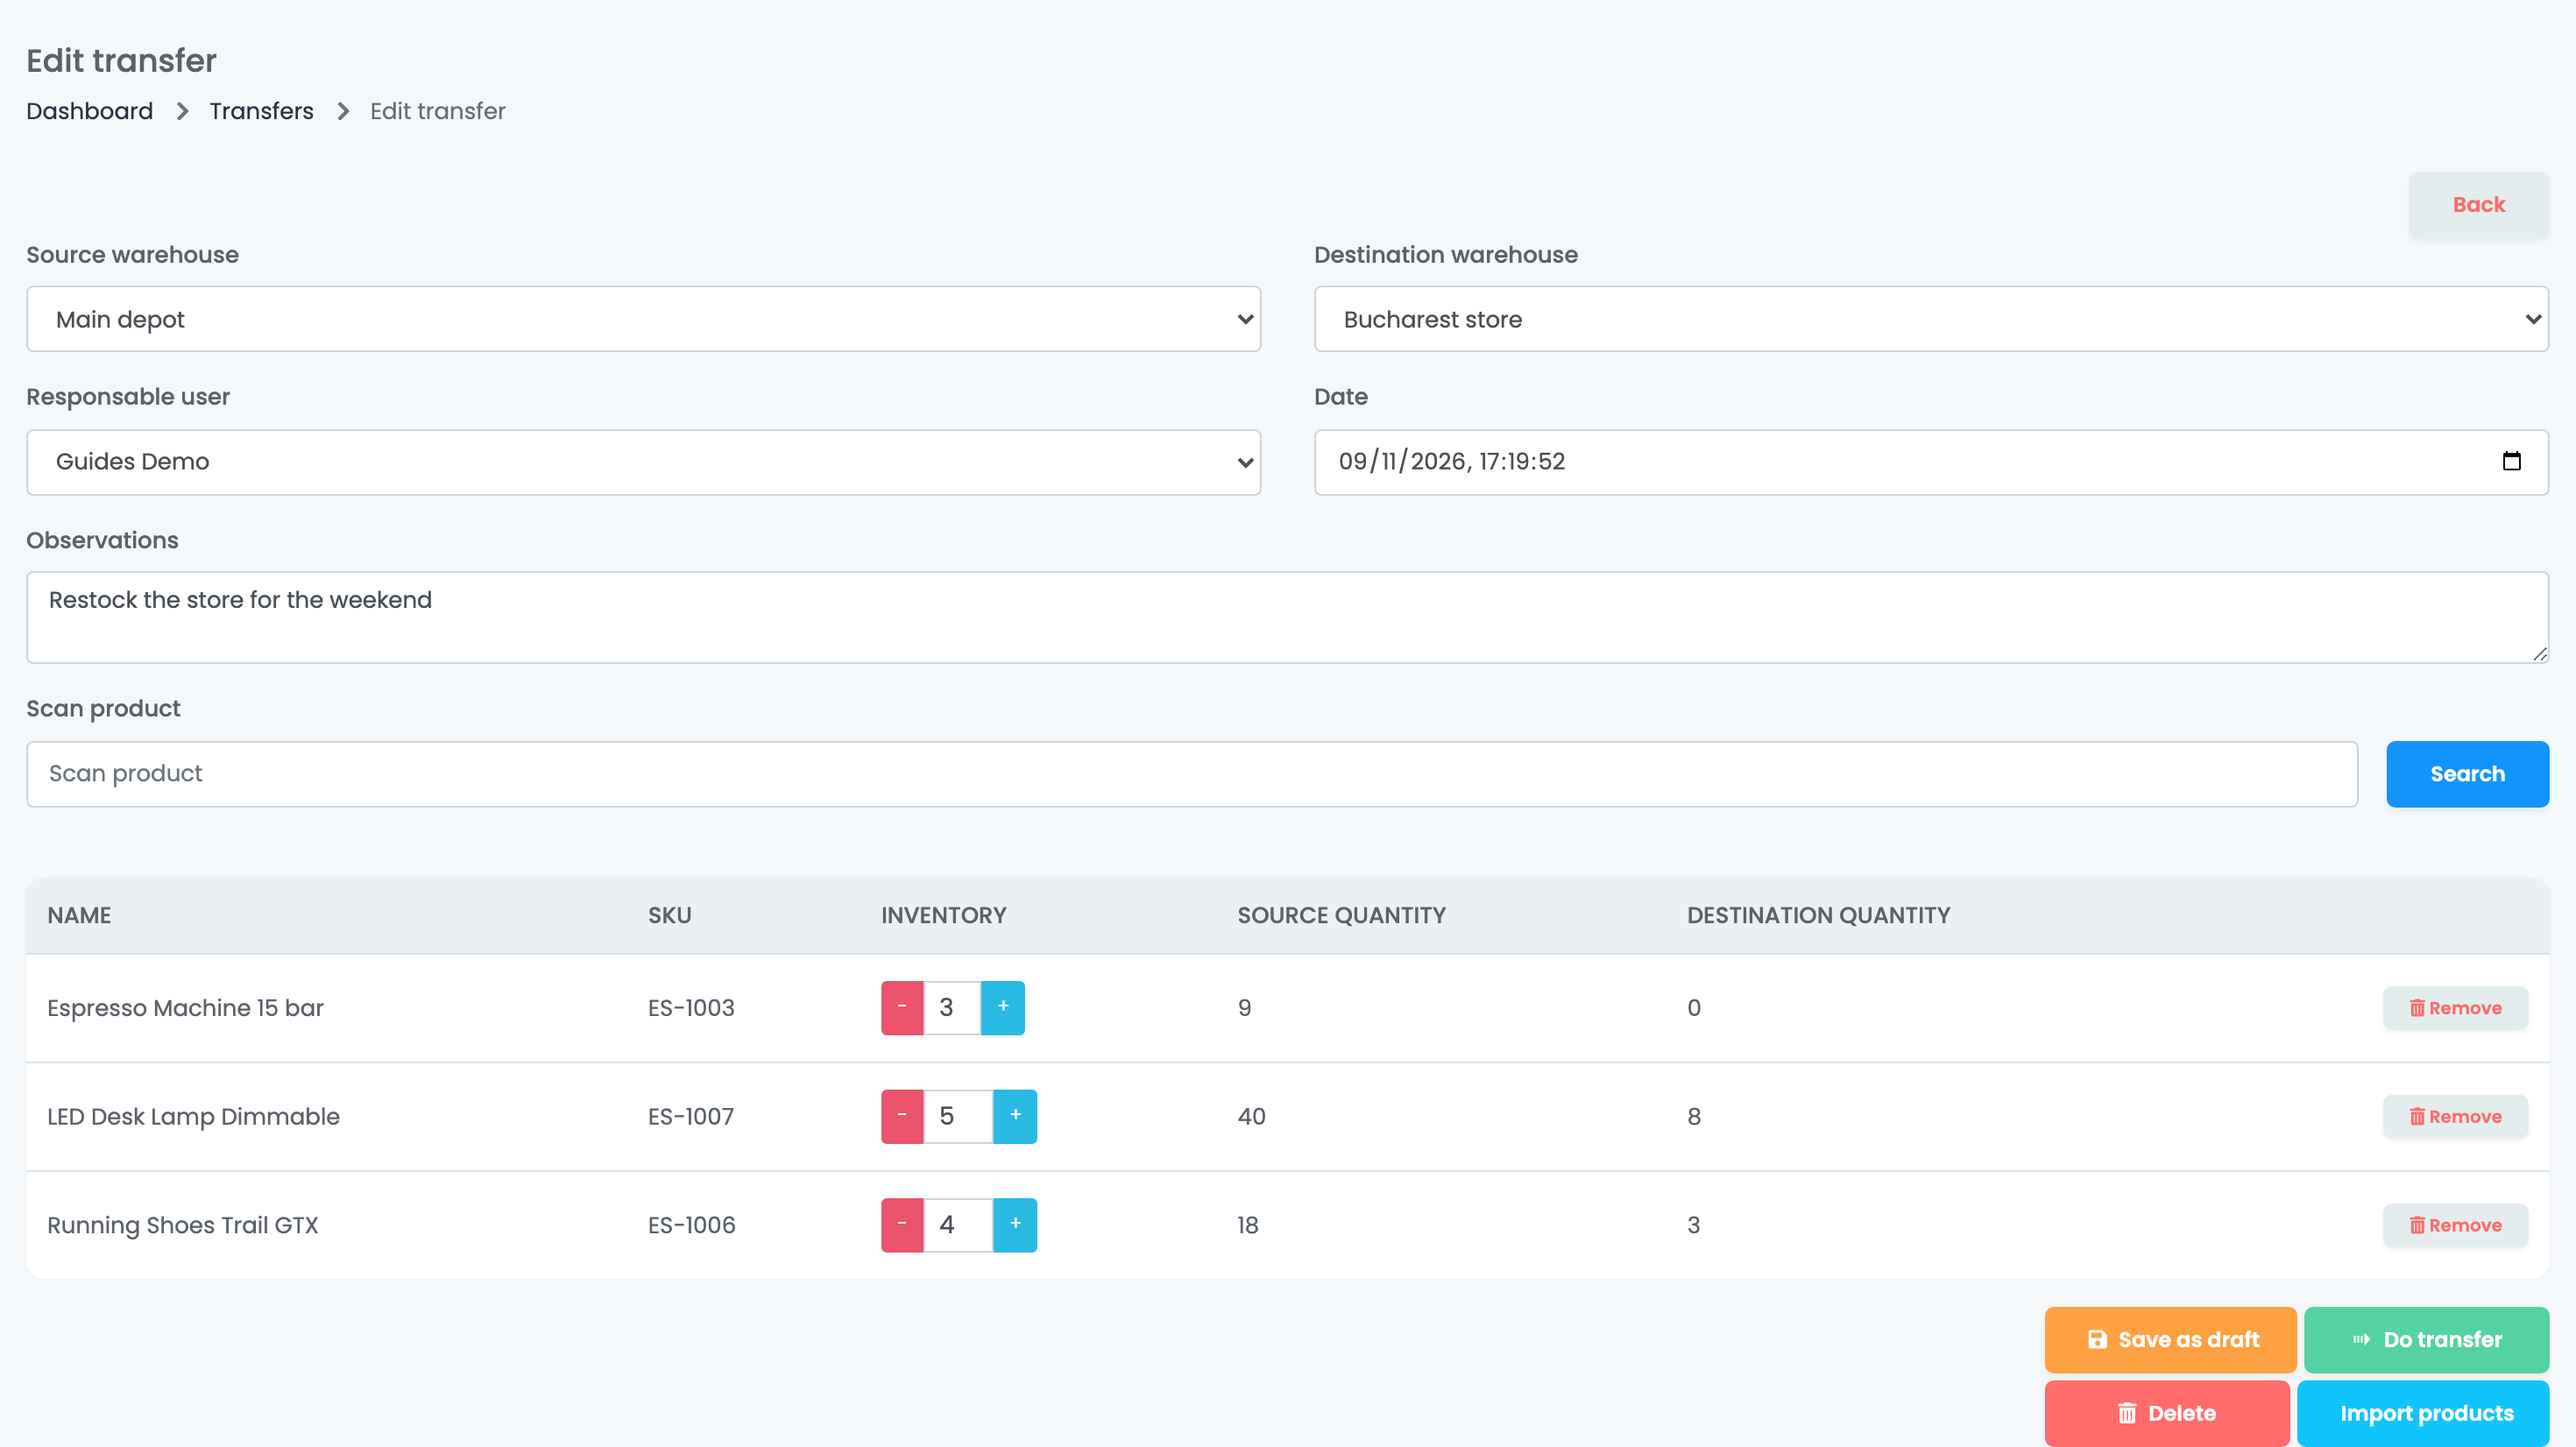
- Press Add new transfer, then choose the Source warehouse and the Destination warehouse. Choose them first: changing either one empties the product list.
- Choose the Responsable user, the Date and, if you want, write Observations.
- Add the products: scan them or type a code in Scan product, or use Import products with a file of SKUs and quantities. Each line shows the stock in both warehouses.
- Set the quantity of each line with − and +. It cannot be more than the stock in the source warehouse.
- Press Do transfer.
The transfer is kept as a draft while you work; Save as draft saves it to finish later. Only a draft can be changed or deleted: a finished transfer stays as it is, so to undo it, make a transfer the other way.
When something does not look right
| Symptom | What to do |
|---|---|
| The stock went back after a count or a transfer | The warehouse takes its stock from another system, which sent its own quantities again. Correct the stock in that system, or use a Manual warehouse. |
| A warehouse cannot be chosen | Warehouses that track batches are not available for counts or transfers. Change their stock from Warehouse stocks. |
| A scanned product shows Unmapped | The code is not stocked in this warehouse. Check the code, or add the product to the warehouse; unmapped lines never change stock. |
| A product cannot be added to a transfer | It has no stock line in the source warehouse. Check that you chose the right source warehouse. |
| The products disappeared from a transfer | Changing the source or destination warehouse empties the list. Choose the warehouses first, then add the products. |
| A transfer was made by mistake | A finished transfer cannot be changed. Make a new transfer the other way. |