How to arrange couriers for AWBs in easySales
Put your courier connections in the order you use them and choose on which marketplaces and online shops each one is offered when you generate an AWB.
What the courier settings decide
When you generate an AWB, easySales lists your courier connections so you can pick one. The AWB courier picker decides two things about that list:
- The order. Your most used courier first, the rest after it.
- Where each connection is offered. For example, your eMAG courier account only on eMAG orders, or a courier you use for your online shop only on its orders.
Open it from Integrations → Delivery → Couriers, with the gear button at the top right, or from Settings → Page settings → Couriers.
Three things to know first:
- Without settings, every connection is offered on every order. The list shows your connections in the order you added them, on all your marketplaces and online shops.
- The settings only change the AWB menus. They do not choose a courier for you, and they do not change which courier a flow or the API uses.
- Nothing is saved until you press Save.
Put the couriers in order
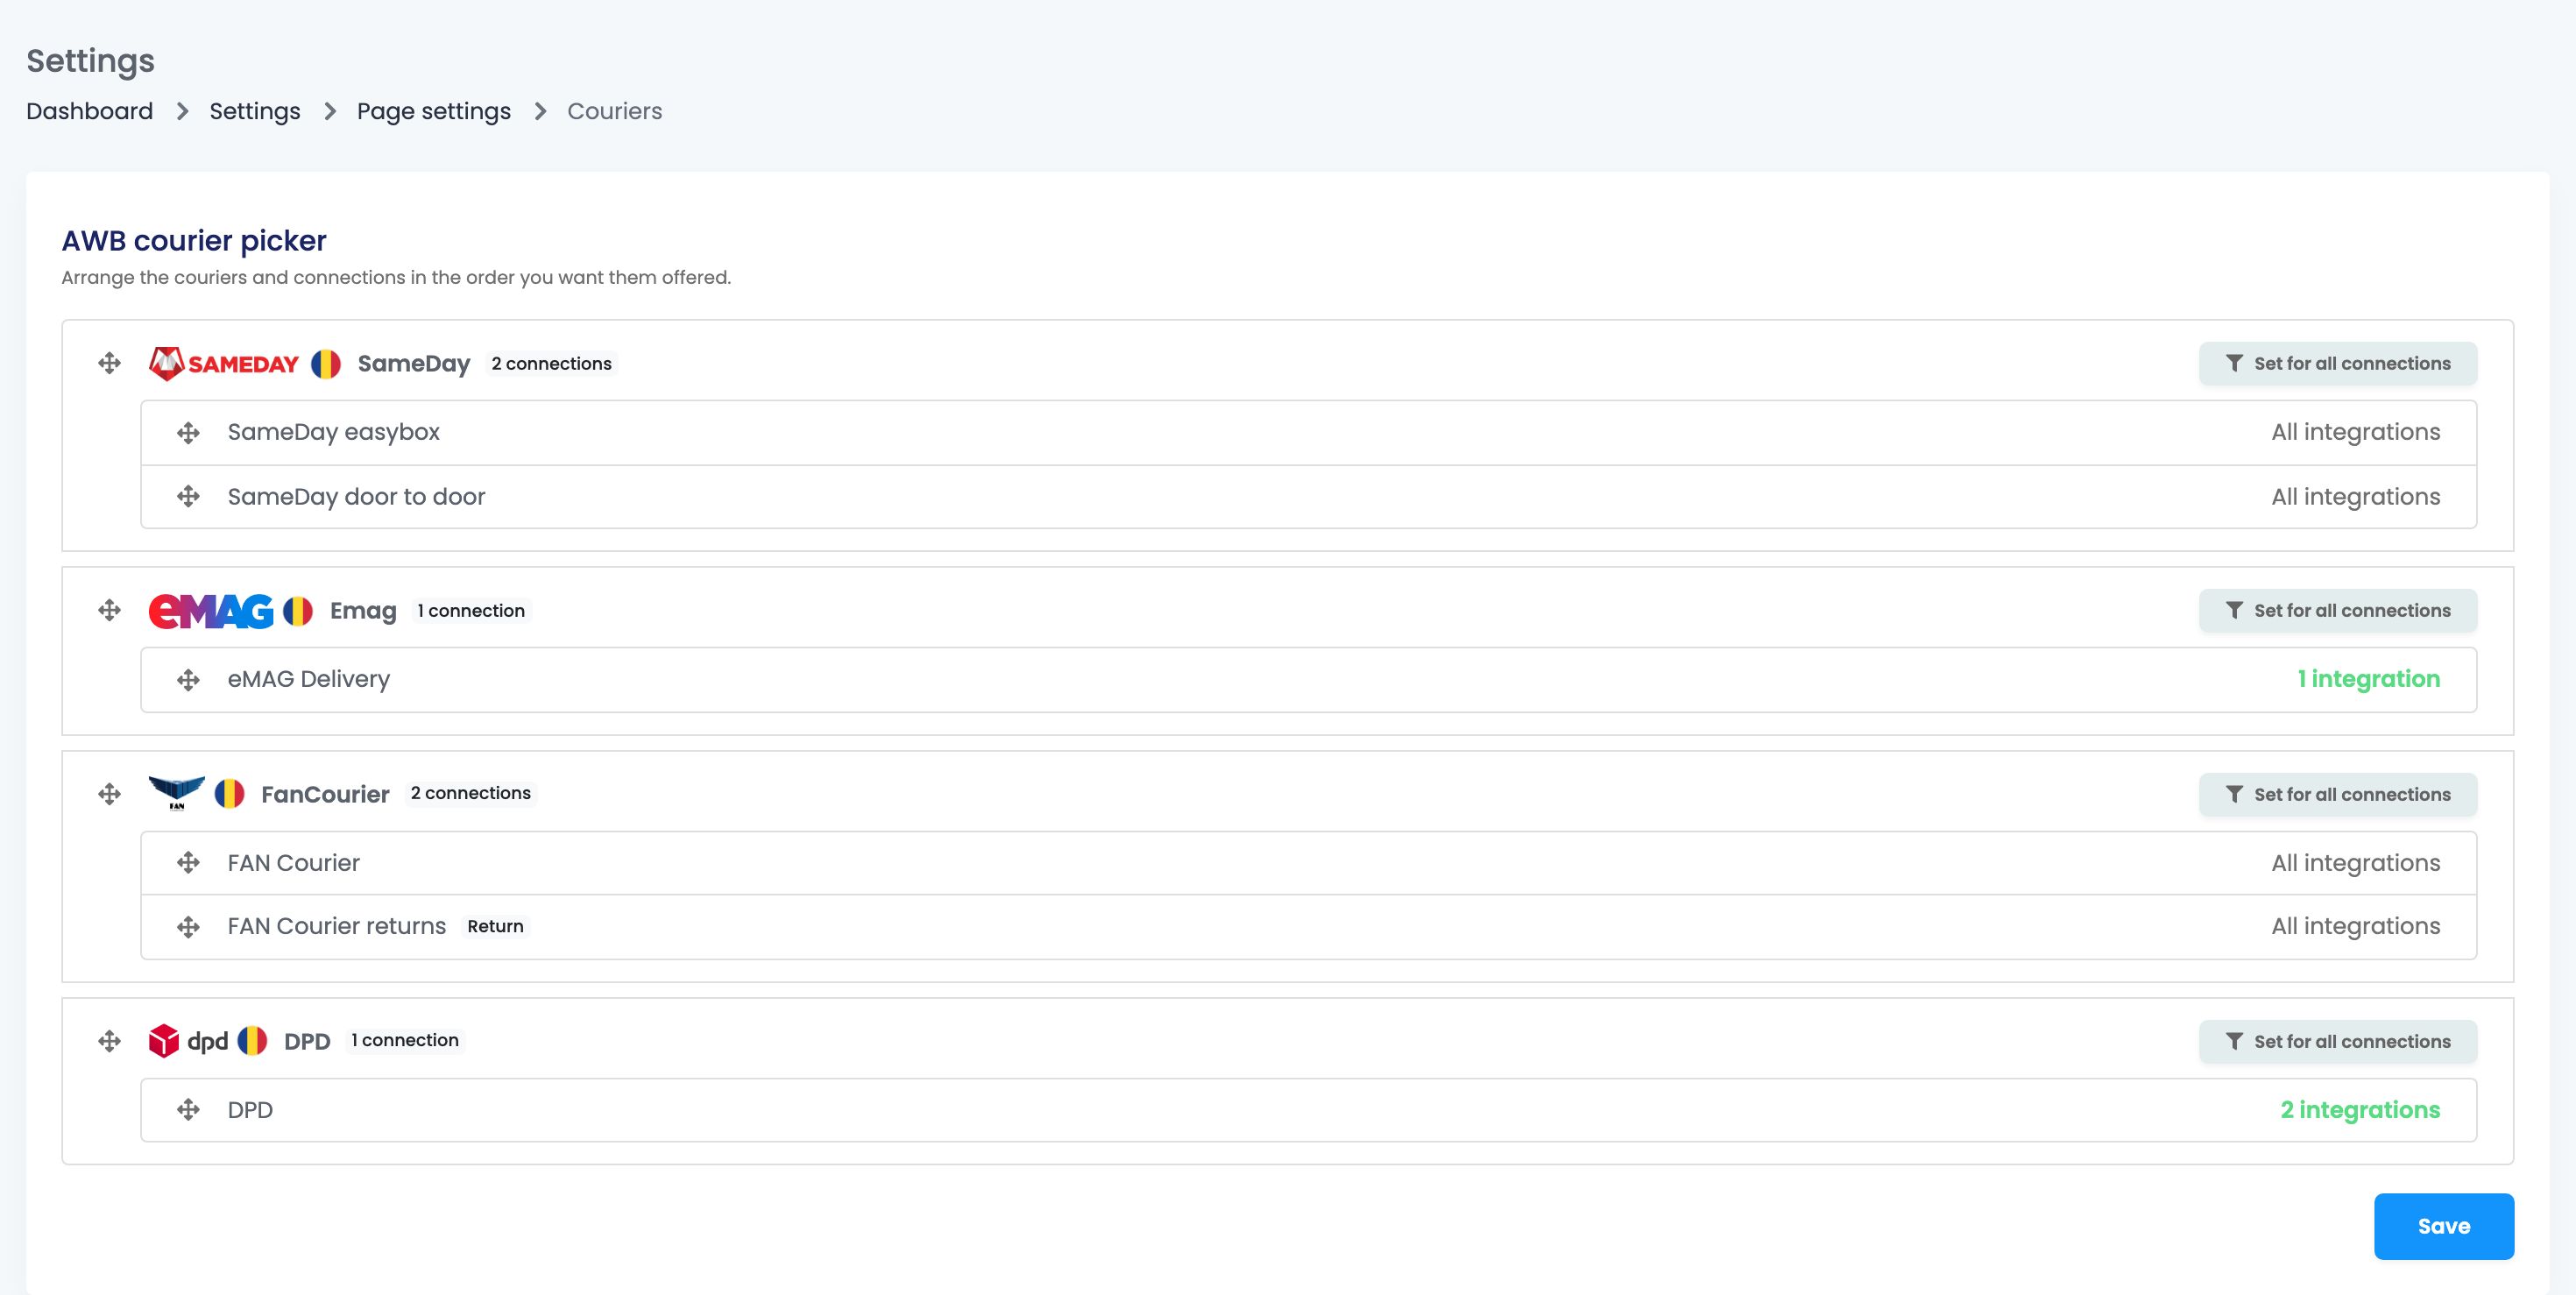
- Drag a courier by the arrows on the left to move it up or down. Its connections move with it.
- Inside a courier, drag its connections in the order you want them. Return connections carry the Return badge.
- Press Save.
When you generate an AWB, the couriers appear in this order. When a courier has more than one connection, choosing it opens the list of its connections, also in this order. The same order is used wherever your courier connections are listed, for example when you choose a courier in a flow.
A connection you add later goes to the end of the list. Move it and save again if you want it higher.
Choose where a connection is offered
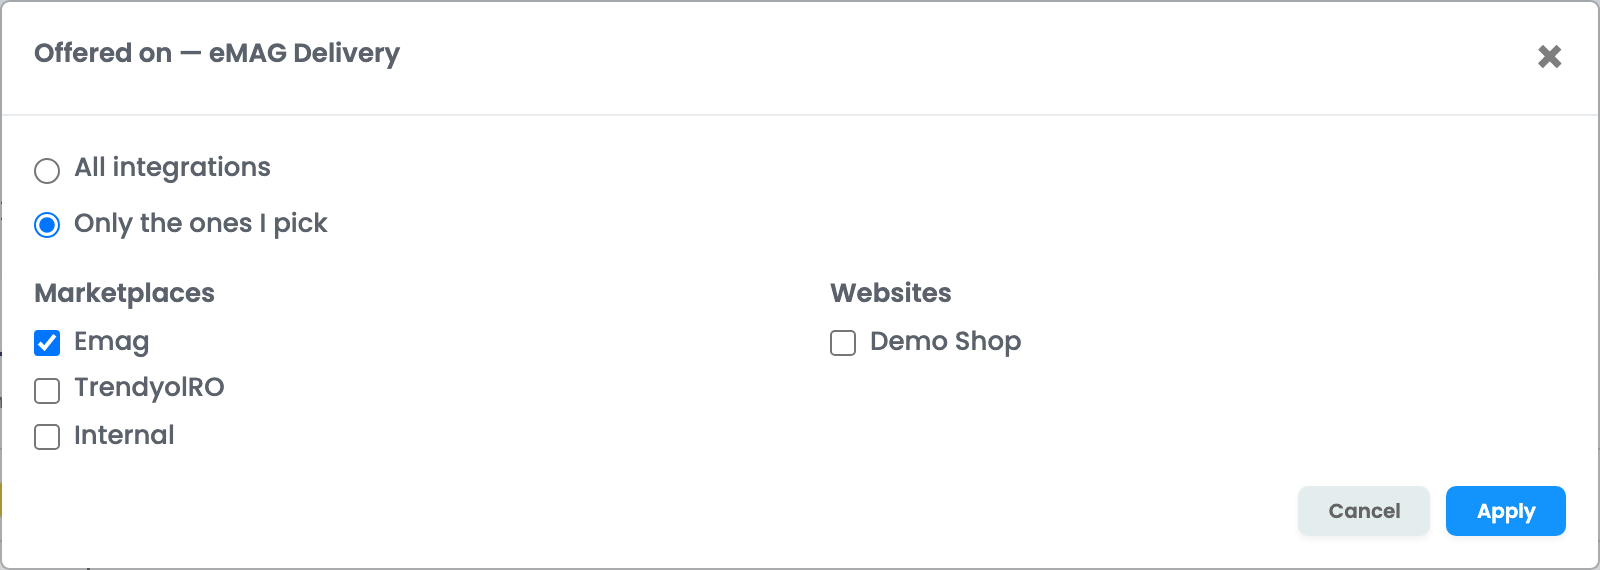
- Press All integrations on the right of the connection.
- Choose Only the ones I pick.
- Tick the marketplaces and the online shops (under Websites) where this connection should be offered.
- Press Apply, then Save.
The link then shows how many integrations the connection is limited to. To offer it everywhere again, open it and choose All integrations. Set for all connections, next to a courier, applies the same choice to all its connections at once.
| Situation | What happens |
|---|---|
| You have two accounts on the same marketplace | The marketplace is ticked once and covers both accounts. |
| An order from a marketplace | The connection is offered if that marketplace is ticked. |
| An order from your online shop | The connection is offered if that shop is ticked under Websites. |
| A manual or imported order | The connection is offered if Internal is ticked. |
Where the settings apply
| Where | Order | Limits |
|---|---|---|
| Generating an AWB from the order page or the orders list | Yes | Yes |
| Bulk actions on several orders and processing groups | Yes | Yes, only connections allowed on every selected order |
| The packing screen | Yes | Yes |
| Return AWBs | Yes | Yes, by the channel of the original order |
| Flows that create AWBs | Yes, in the list of couriers | No, the flow uses the connection you chose in it |
| The easySales API | No | No |
When you select several orders, or work in a processing group, easySales offers only the connections allowed on every selected order's integration. If none is allowed on all of them, you see "No courier connection is offered on all the selected orders' integrations." Select orders from fewer channels, or widen the connection's integrations.
Your team and these settings
The settings apply to the whole account: every team member sees the same order and the same limits. A team member needs View couriers to open the page and Update couriers to save it.
When something does not look right
| Symptom | What to do |
|---|---|
| A courier is missing from the AWB menu of an order | The connection is limited to other integrations. Open its integrations and tick the order's marketplace or shop. |
| A courier is missing on manual orders | Tick Internal on that connection, or choose All integrations. |
| "No courier connection is offered on all the selected orders' integrations." | The selected orders come from channels with no connection in common. Select fewer channels at a time, or widen the connection's integrations. |
| My changes are gone | The changes are kept only after you press Save. |
| A new connection is at the bottom of the list | New connections are added at the end. Drag it where you want it and press Save. |
| A flow still uses a courier I limited | The limits only change the AWB menus. Change the connection in the flow's action. |