How to connect WhatsApp Business with easySales: a complete setup guide
Connect WhatsApp Business to easySales: the Meta app and a permanent access token, the WABA ID, registering the number with its PIN, the webhook, approved templates, automatic notifications and what each WhatsApp error means.
What WhatsApp Business does in easySales
With WhatsApp Business connected, easySales sends your customers order messages on WhatsApp instead of, or as well as, SMS and e-mail: an order confirmation, the AWB and a tracking link, an invoice, a cancellation. The messages go out automatically when the event happens, from your own WhatsApp Business number.
The connection runs through Meta, the company behind WhatsApp. Most of the work is on Meta's side and is done once; after that, everything happens in easySales.
Before you start
A Meta business portfolio
At business.facebook.com, with admin access. The WhatsApp account and the app both live in it.
A phone number for WhatsApp
One that can receive an SMS or a call for verification and is not in use on the WhatsApp app.
A Meta developer account
To create the app at developers.facebook.com. You sign in with a personal Facebook account.
A payment method in Meta
WhatsApp charges for business messages, and Meta bills you directly.
Step 1 — Set up WhatsApp in your Meta business portfolio
- In business.facebook.com, open your business portfolio, go to Settings → Accounts → WhatsApp accounts and add a WhatsApp account. The display name is what customers see, so use your shop or brand name.
- Add the phone number and verify it with the code Meta sends by SMS or call.
- Note the WhatsApp Business Account ID shown under the account name. This is the WABA ID easySales asks for.
- In WhatsApp Manager → Phone numbers, open the number and set a six-digit two-step verification PIN. You need it in Step 4.
Step 2 — Create an app and an access token that does not expire
easySales talks to WhatsApp through an app you own in Meta.
- In developers.facebook.com, create an app and choose the use case Connect with customers through WhatsApp. Link it to the same business portfolio.
- Create the access token from a system user: in your business settings, go to Users → System users, add one, assign it the app and the WhatsApp account, then generate a token with the
whatsapp_business_messagingandwhatsapp_business_managementpermissions.
Step 3 — Connect WhatsApp in easySales
Go to Integrations → SMS Services and press Connect on the WhatsApp card.
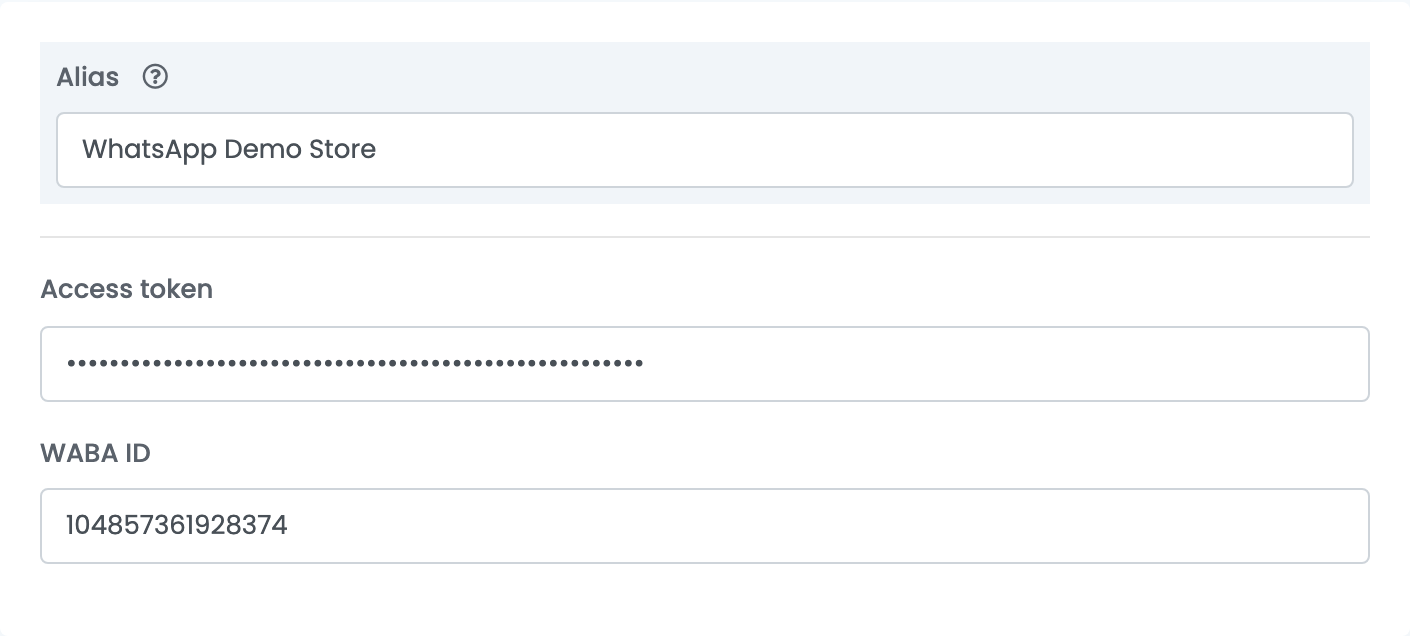
Enter an Alias for the connection, paste the Access token and the WABA ID, and press Get Details. easySales reads the phone numbers on that WhatsApp account and adds a Phone number field. Choose the number that should send your messages and press Save.
Step 4 — Register the phone number
Open the connection again and press Get Details. Under the phone number you now see Register phone number.
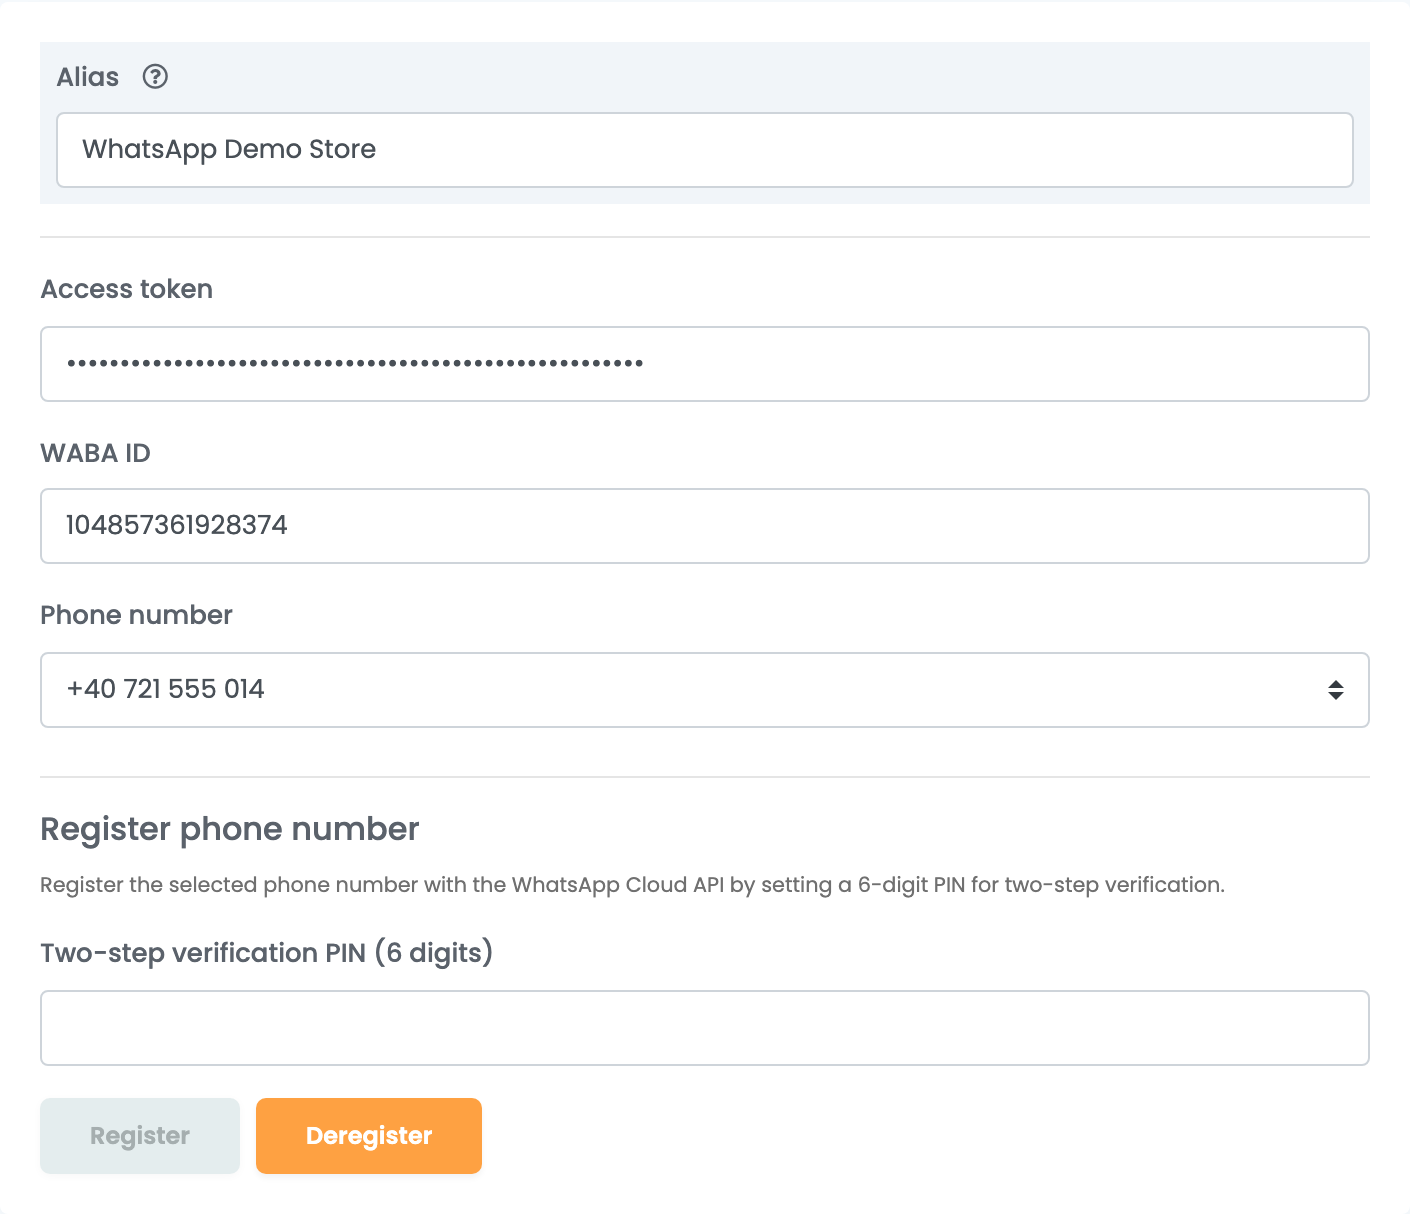
Type the six-digit PIN you set in WhatsApp Manager into Two-step verification PIN (6 digits) and press Register. You see Phone number registered successfully.
Step 5 — Connect the webhook
The webhook is how WhatsApp tells easySales what happened to each message — sent, delivered, read or failed — and how your customers' replies reach easySales.
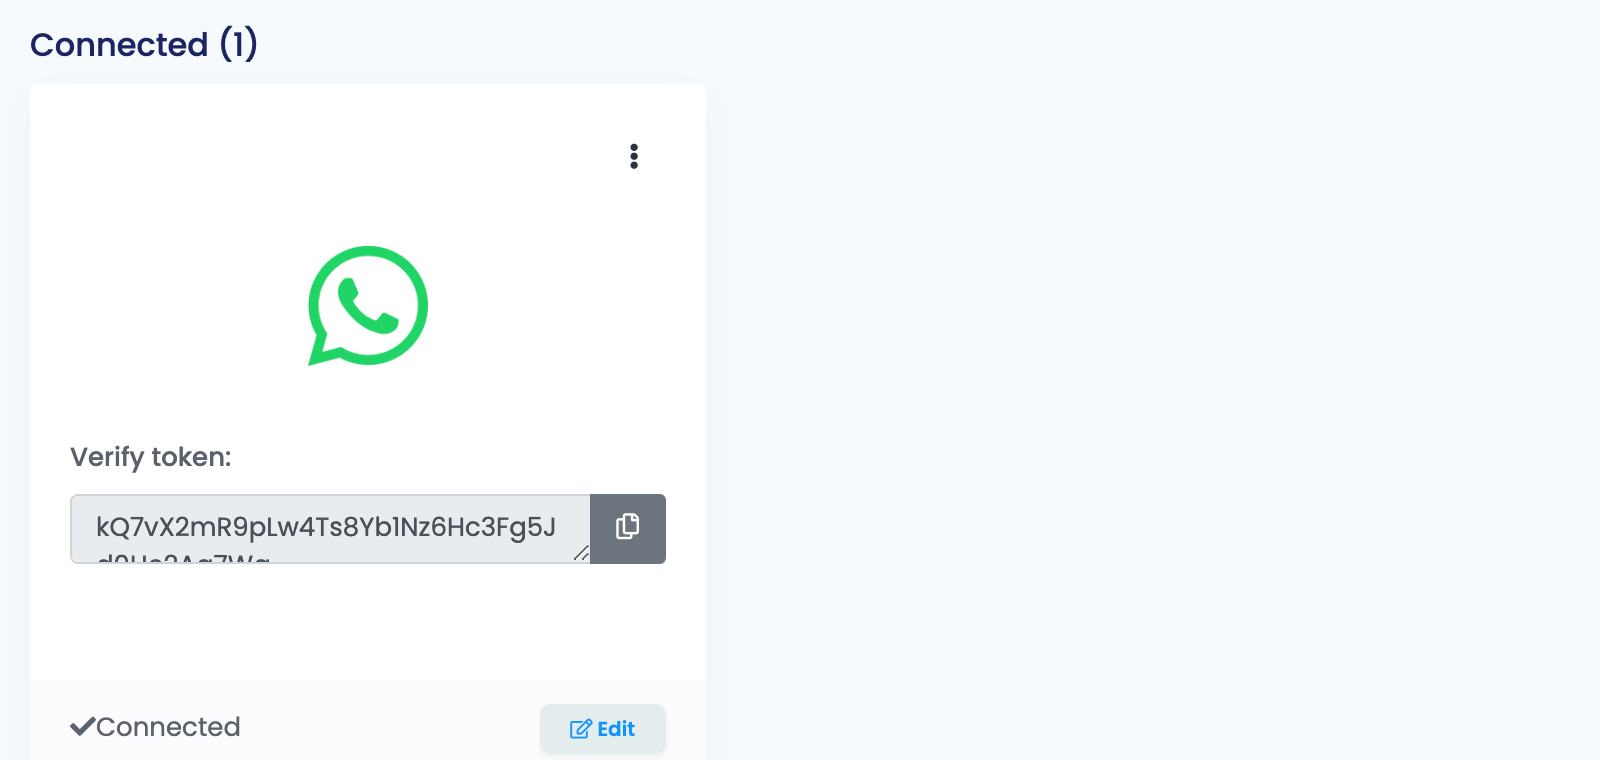
Once the connection is saved, the WhatsApp card on SMS Services shows a Verify token. Copy it with the button beside it.
In your app on developers.facebook.com, open WhatsApp → Configuration and fill in:
| Field in Meta | What to enter |
|---|---|
| Callback URL |
https://easy-sales.com/services/sms/external-webhooks/whatsapp/webhook
|
| Verify token | The Verify token from the WhatsApp card in easySales, exactly as copied. |
| Webhook fields | Subscribe to messages. It carries both the delivery statuses and customers' replies. |
Press Verify and save, then subscribe to the messages webhook field.
Step 6 — Create your message templates
WhatsApp only lets a business start a conversation with a message template WhatsApp has approved. You write the templates in easySales and send them to WhatsApp from there.
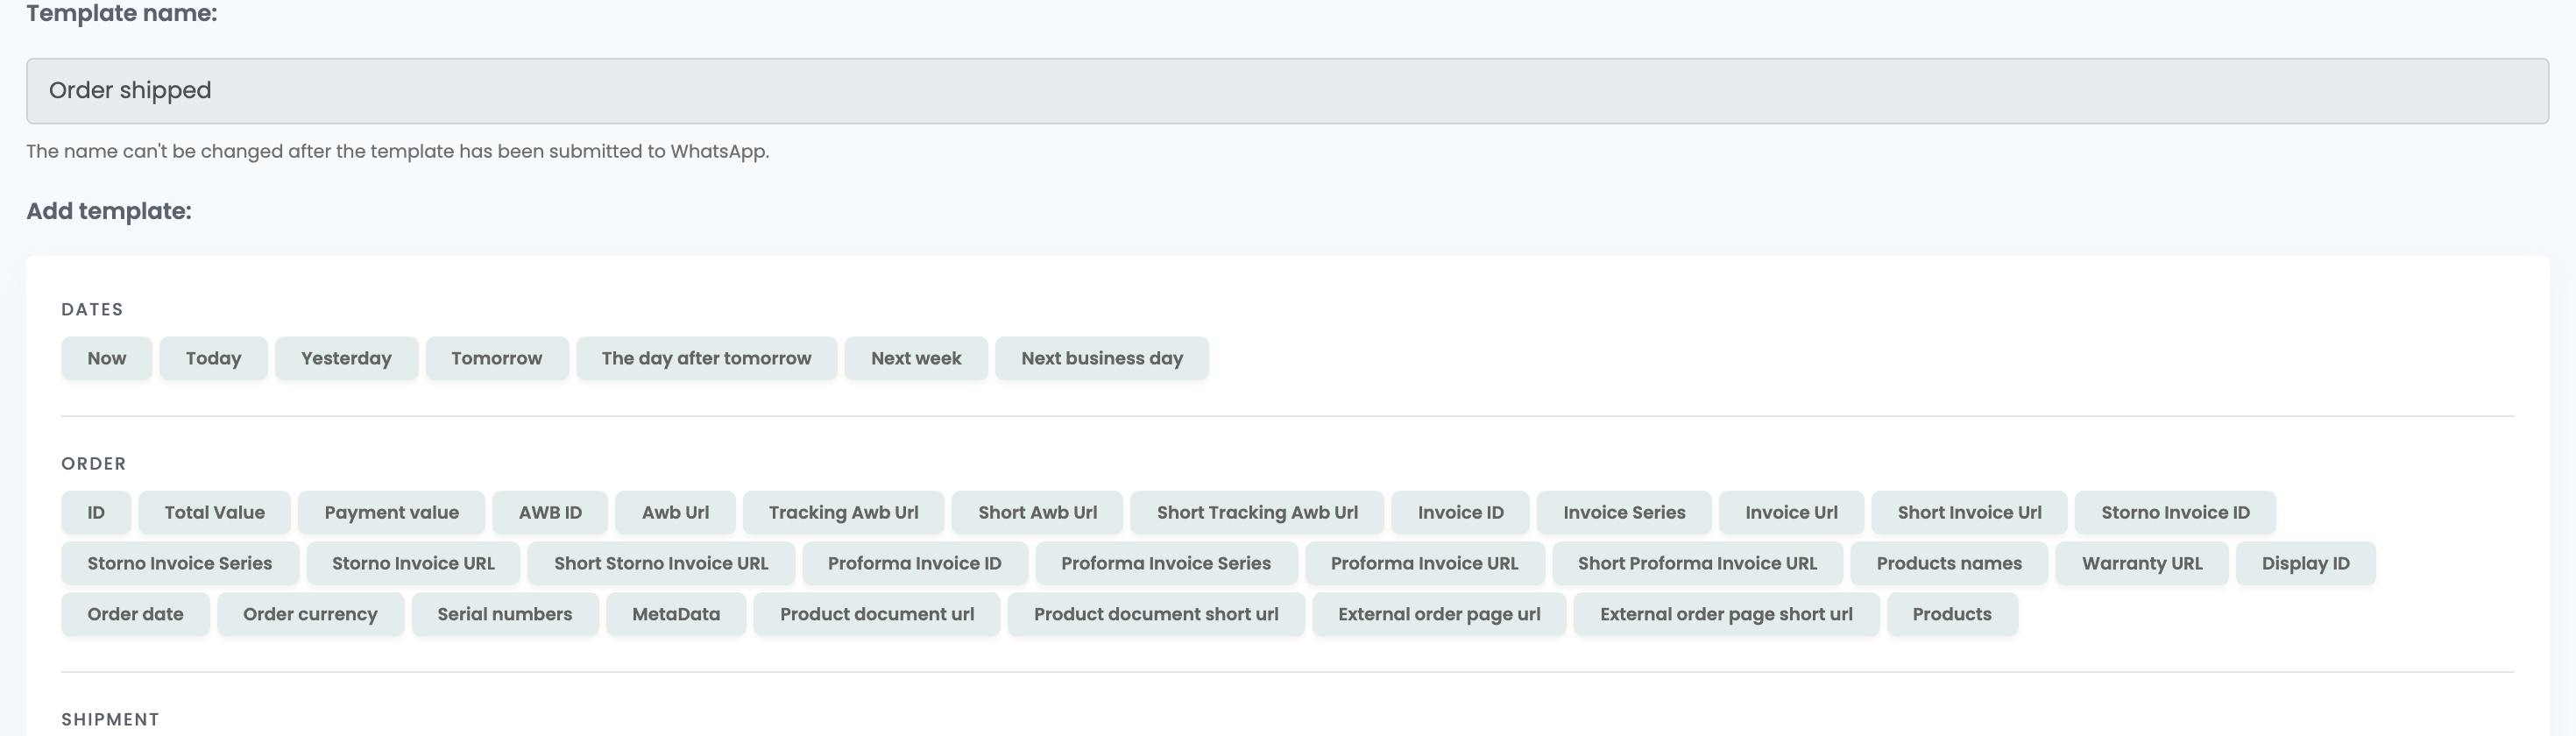
Go to Customers → Templates, open the SMS tab and press Create sms template. Give it a name, write the message and add variables from the buttons above the text box — ${customer.name}, ${order.id}, ${order.awb_id} and so on. WhatsApp formatting such as *bold* works.
When the template is ready, press Send to WhatsApp next to it in the list. Its status appears under Channels submitted:
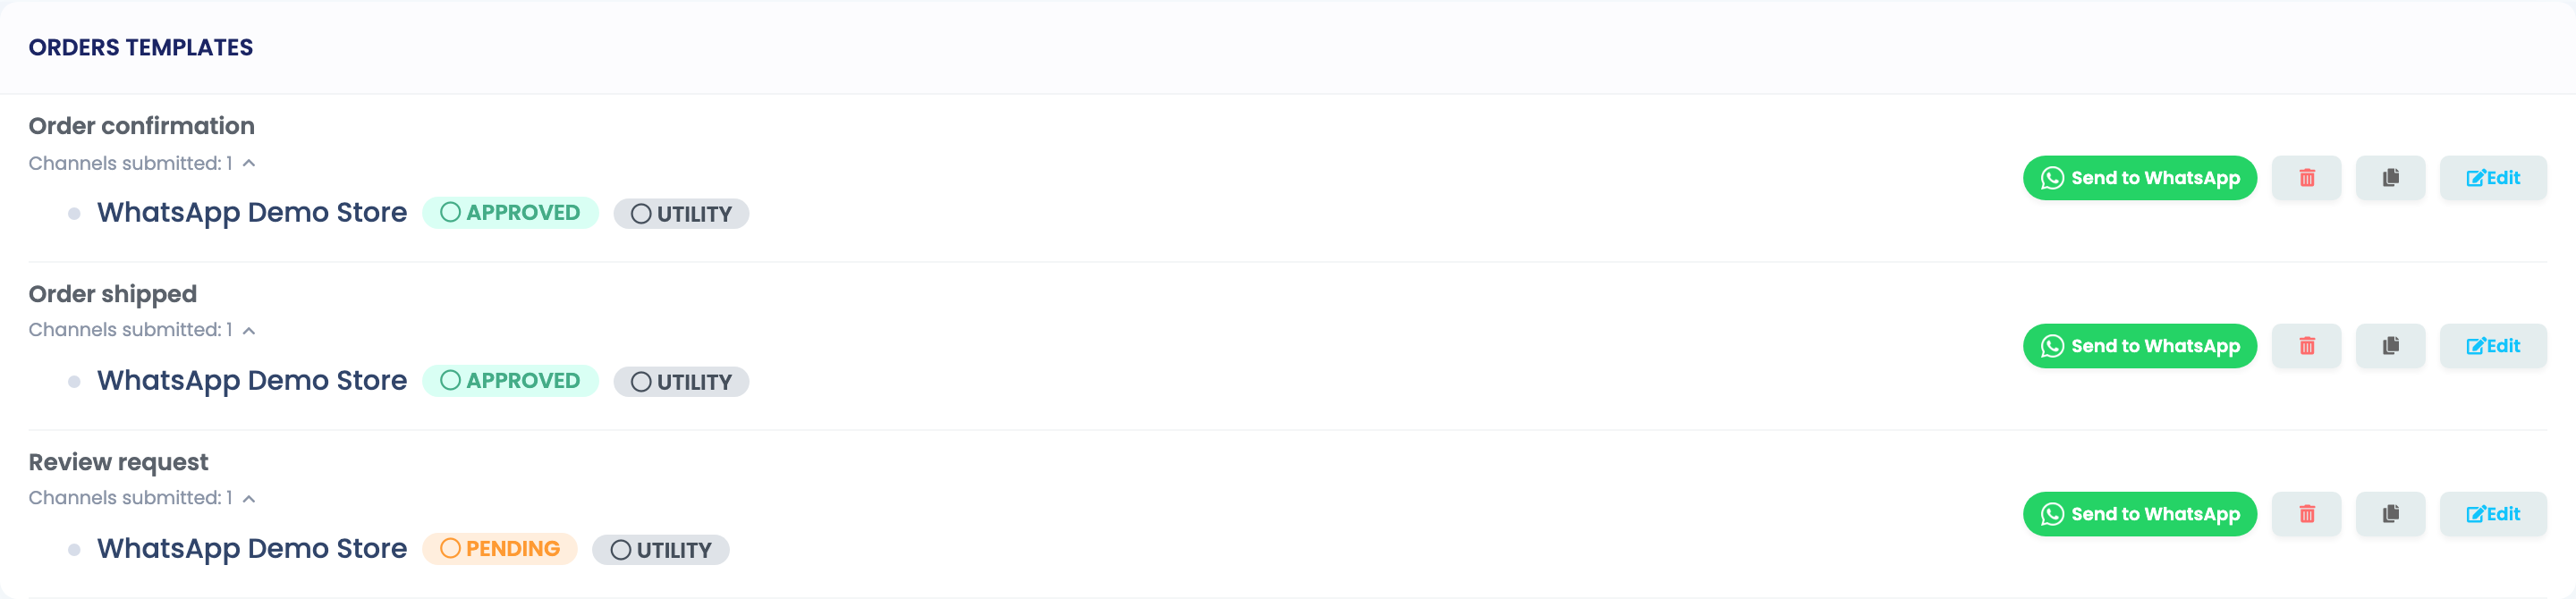
| Status | What it means |
|---|---|
| PENDING | WhatsApp is reviewing the template. easySales checks for a decision every few minutes. |
| APPROVED | Ready to use in notifications and manual sends. |
| REJECTED | WhatsApp refused it. Change the text and send it to WhatsApp again. |
| UTILITY (category) | Every template is sent as a Utility message. WhatsApp can move it to another category after review. |
Step 7 — Send them automatically
Go to Customers → Notifications. Each event has its own row — AWB Created, Order Created, Invoice Created, Order Canceled, AWB Status Updated, the return events and more. Press Create on the event you want.
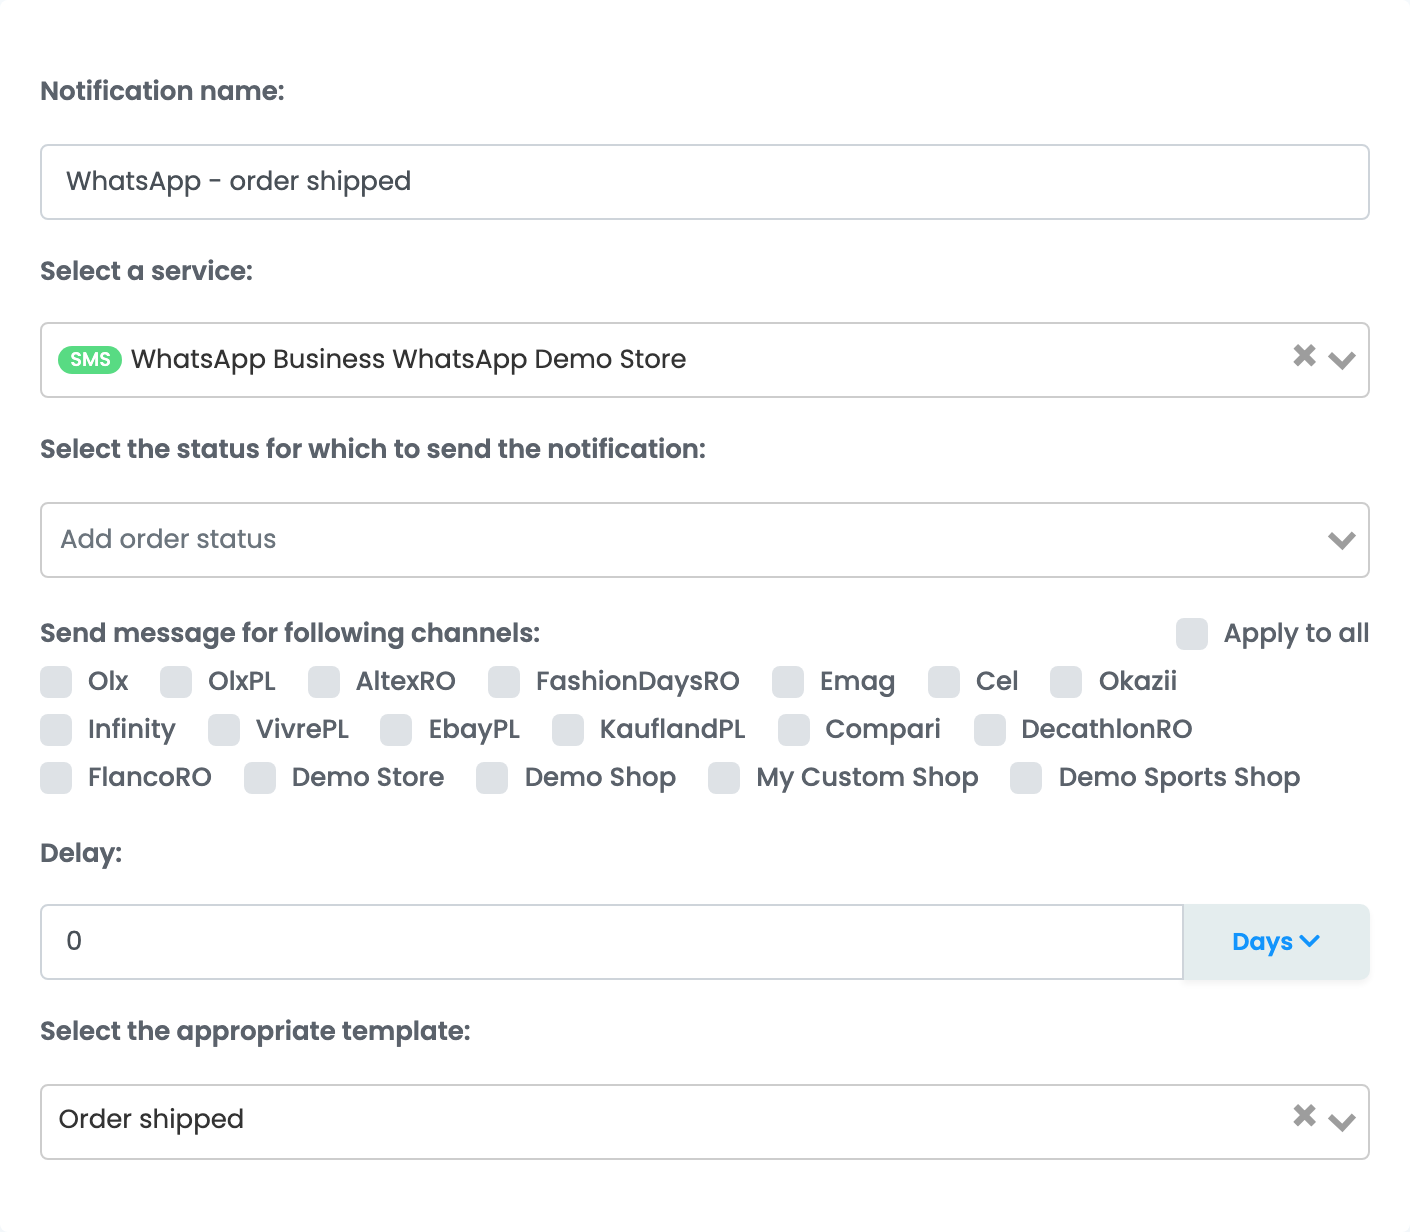
Name the notification, choose your WhatsApp connection under Select a service, pick the channels it applies to, set a delay if you want one, and choose an approved template. Save, and every order that reaches that event gets the message.
You can also send a single message by hand from the order screen, choosing the WhatsApp connection and an approved template.
Where to see what was sent
Every message appears in Customers → SMS History, with its status and, when WhatsApp refused it, WhatsApp's reason.
| What you see in SMS History | What to do |
|---|---|
| Status stays in progress | The webhook is not connected. Complete Step 5. |
Account not registered
|
The phone number is not registered. Register it with its PIN (Step 4). |
Authentication Error
|
The access token expired or was revoked. Create a system user token and paste it into the connection. |
(#131008) Required parameter is missing
|
A variable in the template is empty on that order — for example a customer name the marketplace does not share. Use variables every order has, or a separate template for that channel. |
(#131009) Parameter value is not valid
|
Usually the order has no phone number, so there is no one to send to. |
(#131037) … display name approval …
|
Meta has not yet approved the number's display name. Wait for the approval in WhatsApp Manager. |
Message undeliverable
|
WhatsApp could not deliver to that number — it may not use WhatsApp. |
Paying for messages
WhatsApp business messages are billed by Meta, not by easySales. Add a payment method to your business portfolio before sending to customers, and check Meta's current WhatsApp pricing — it depends on the type of message and the customer's country.