How to connect Shoprenter with easySales: a complete setup guide
Connect Shoprenter to easySales through the app market or by hand: the API URL and credentials, VAT and inventory source, the four stock fields, product language, status mappings and what comes across with a product.
What connecting Shoprenter gives you
easySales reads your Shoprenter catalogue and turns it into offers it can send to marketplaces, and it reads your Shoprenter orders so you can invoice them, print AWBs and pack them next to every other order you take. Nothing is installed in the shop itself — no plugin, no template change.
Two ways to connect, and the short one is an app
| What happens | |
|---|---|
| The easySales app in the Shoprenter app market | Install it in your shop. Shoprenter hands easySales the API user name and password itself, and you land on a connection form with them already in it. |
| By hand | Go to Integrations → Websites → Connect a Website, pick Shoprenter, and copy the user name and password out of your shop's Settings → API Settings. |
The app is the shorter path and the one to use unless something stops you. Everything below covers both: the app fills in the credentials for you, and the manual route means copying them yourself.
Before you start
A Shoprenter shop, with admin access to it.
Its API settings — the API URL, user name and password — unless you install the app, which supplies them.
A different SKU on every product, and stock held as a number.
Step 1 — Describe the shop
Whichever route you took, you land on the same form. The values in the screenshots belong to a demo shop; yours describe your own.
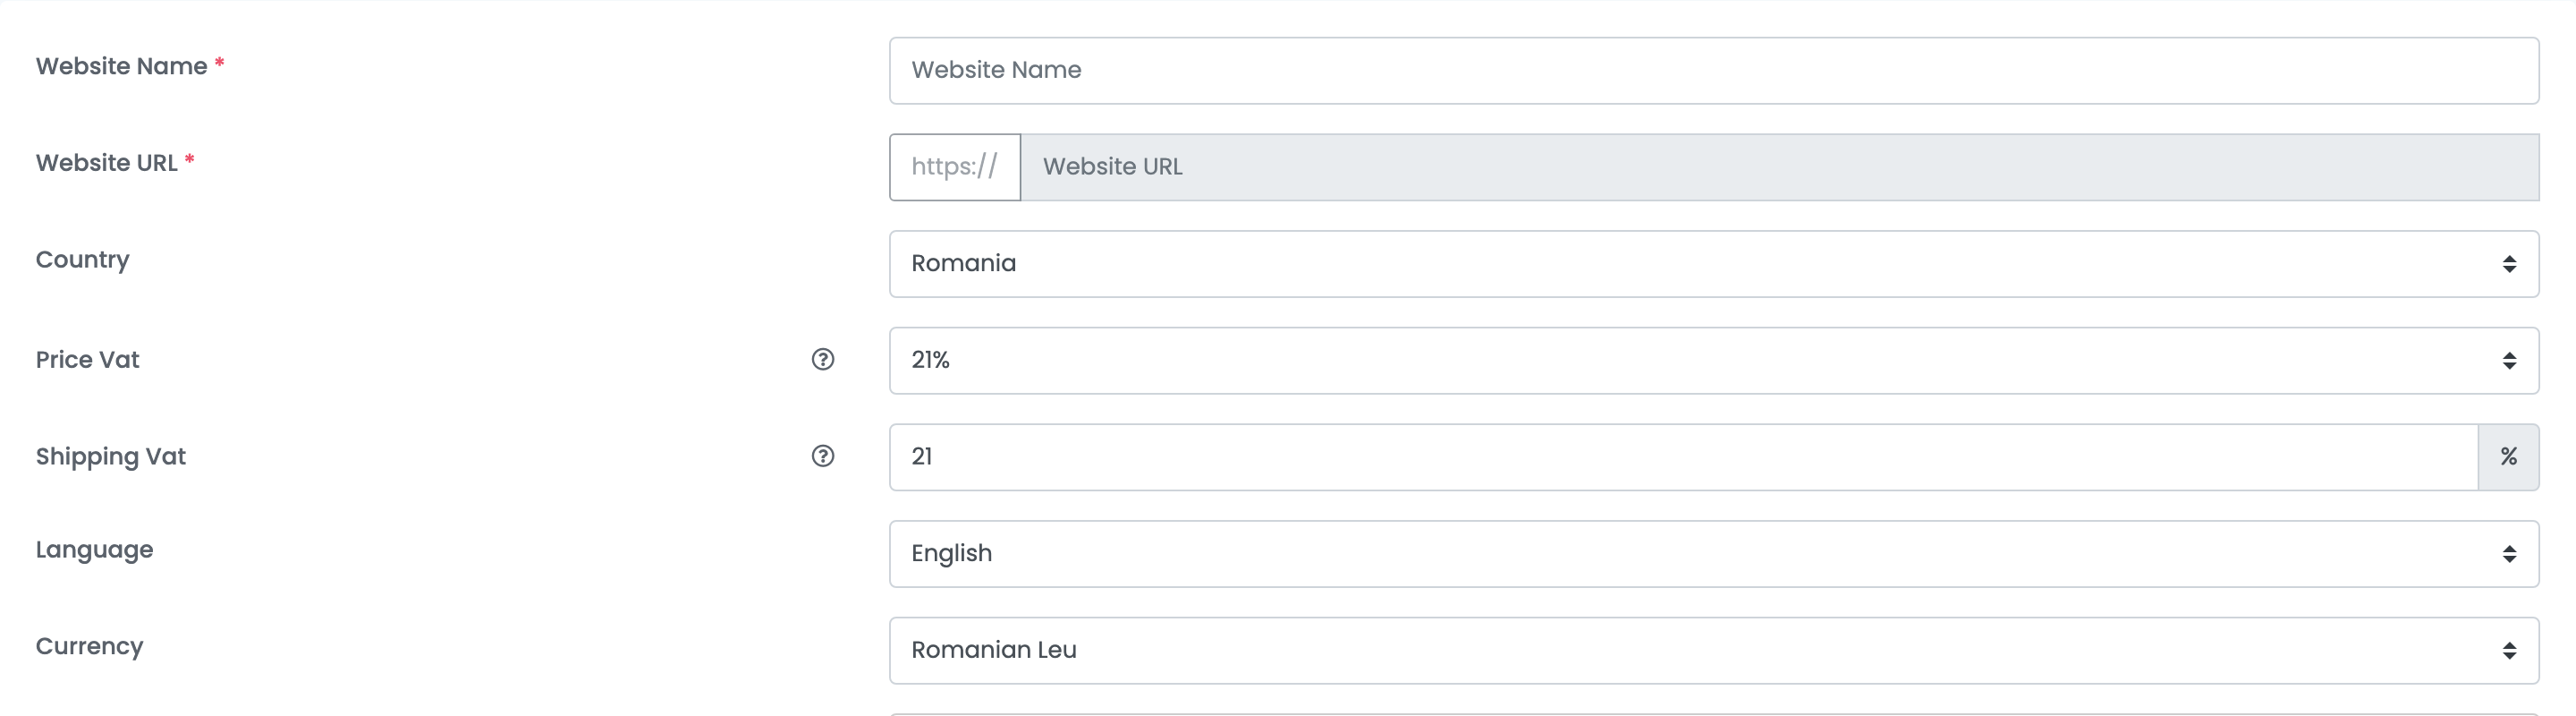
| Field | What goes in it |
|---|---|
| Website Name | Whatever you want to call this shop inside easySales. |
| Website URL |
The API address from Settings → API Settings in Shoprenter, ending in .api.myshoprenter.hu.
|
| Country | The shop's country. It cannot be changed after the connection is saved. |
| Price Vat and Shipping Vat | The VAT rates your prices and your delivery charges already include. Leave them at zero if you do not charge VAT. |
| Language and Currency | What the shop sells in. Both are fixed once saved. |
| New order custom status | Optional. A status of your own that every order from this shop starts in. |
Step 2 — Stock and invoicing
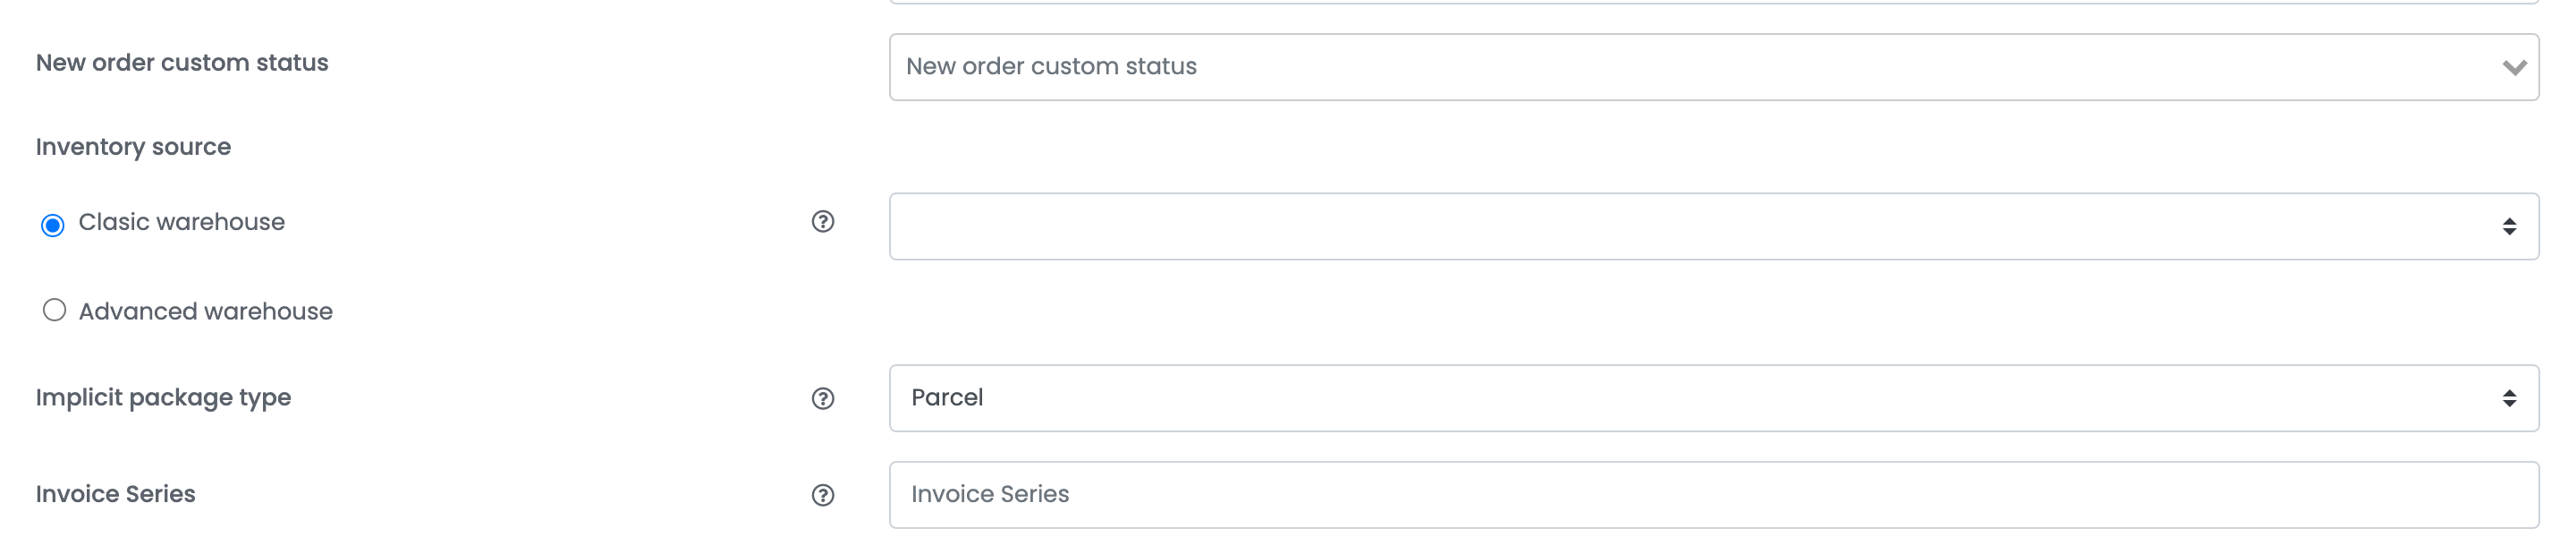
| Field | What it does |
|---|---|
| Inventory source — Classic warehouse | One stock figure per product. The list beside it says where that figure is read from: the website, if the shop is where you manage stock, or easySales, if you manage it here and want it pushed back. |
| Inventory source — Advanced warehouse | Stock split across several locations, with rules deciding which one an order draws from. |
| Implicit package type | The package type orders from this shop are imported with, used when an AWB is generated. |
| Invoice Series | The billing series orders from this shop are invoiced on. |
Step 3 — The API credentials
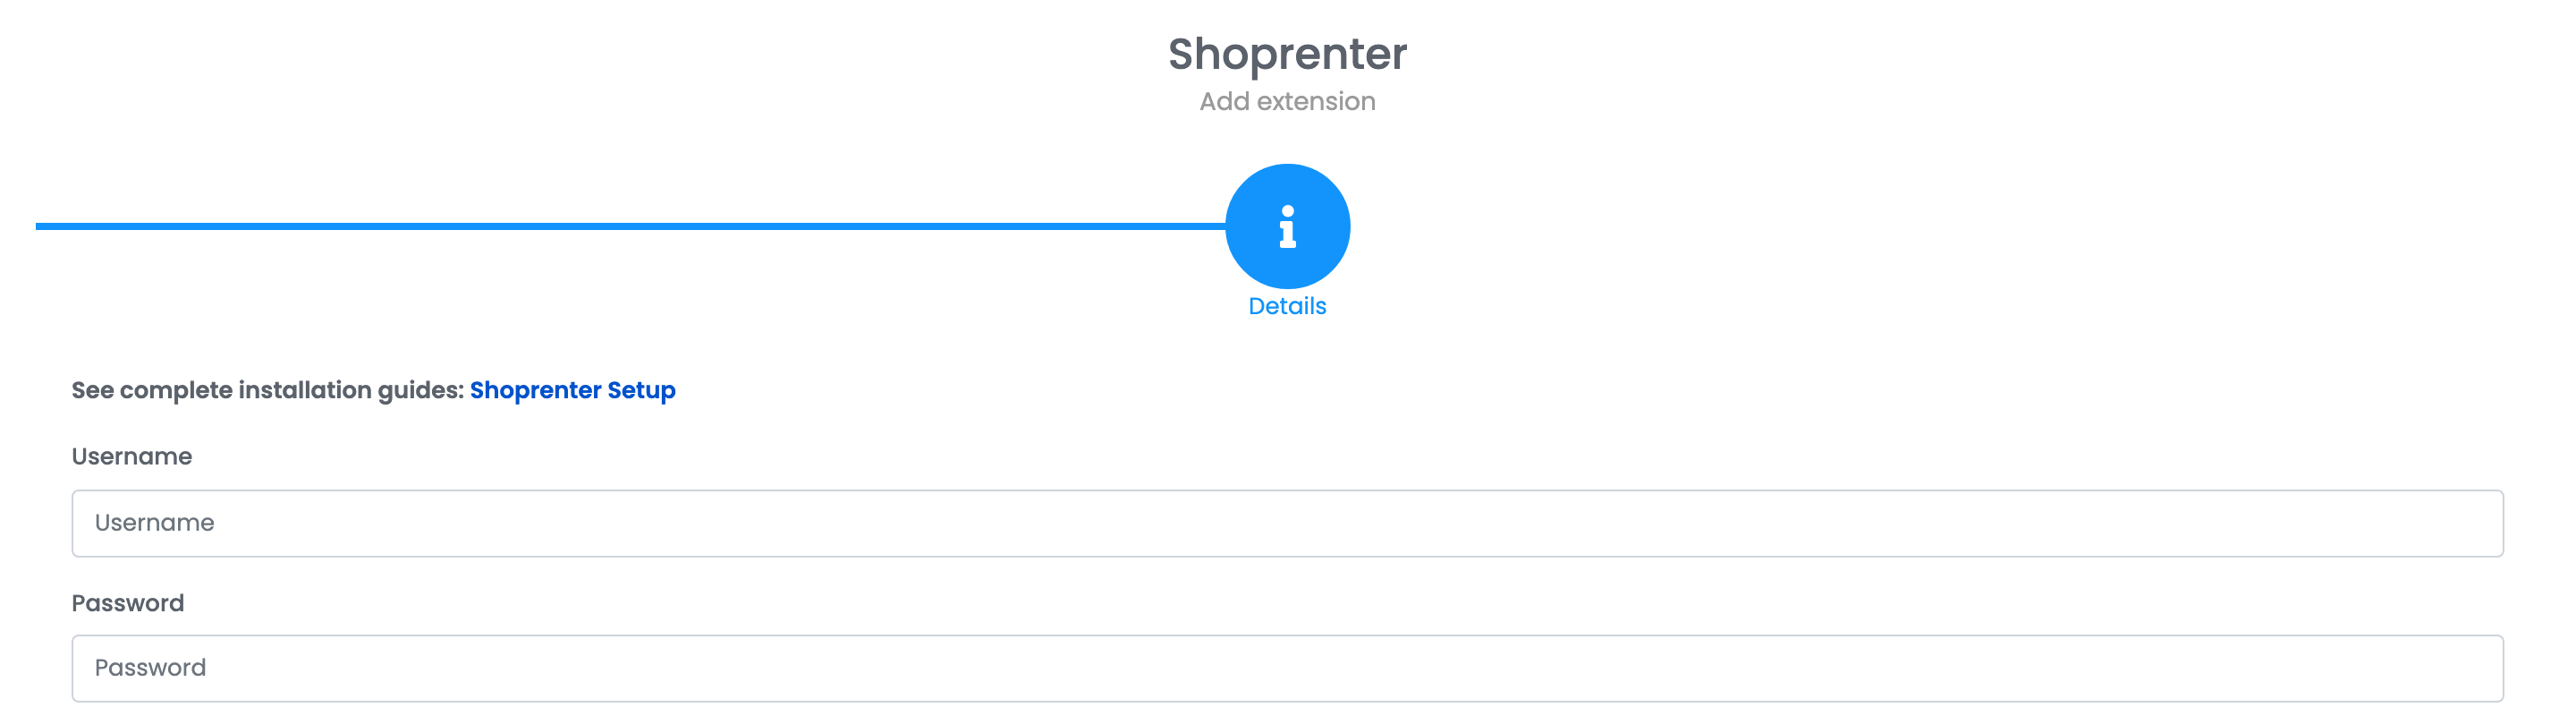
If you installed the app, these two are already filled in and you can go straight to Save.
If you are connecting by hand, open your Shoprenter admin, go to Settings → API Settings, and copy the user name and password shown there. The same screen carries the API URL you need for the Website URL field above.
Press Save. Products start appearing under Online Shop → Products within a few minutes.
Step 4 — The Shoprenter settings
Open the shop from Integrations → Websites, press the pencil on its card, and go to Preferences. The first block is Shoprenter's own.
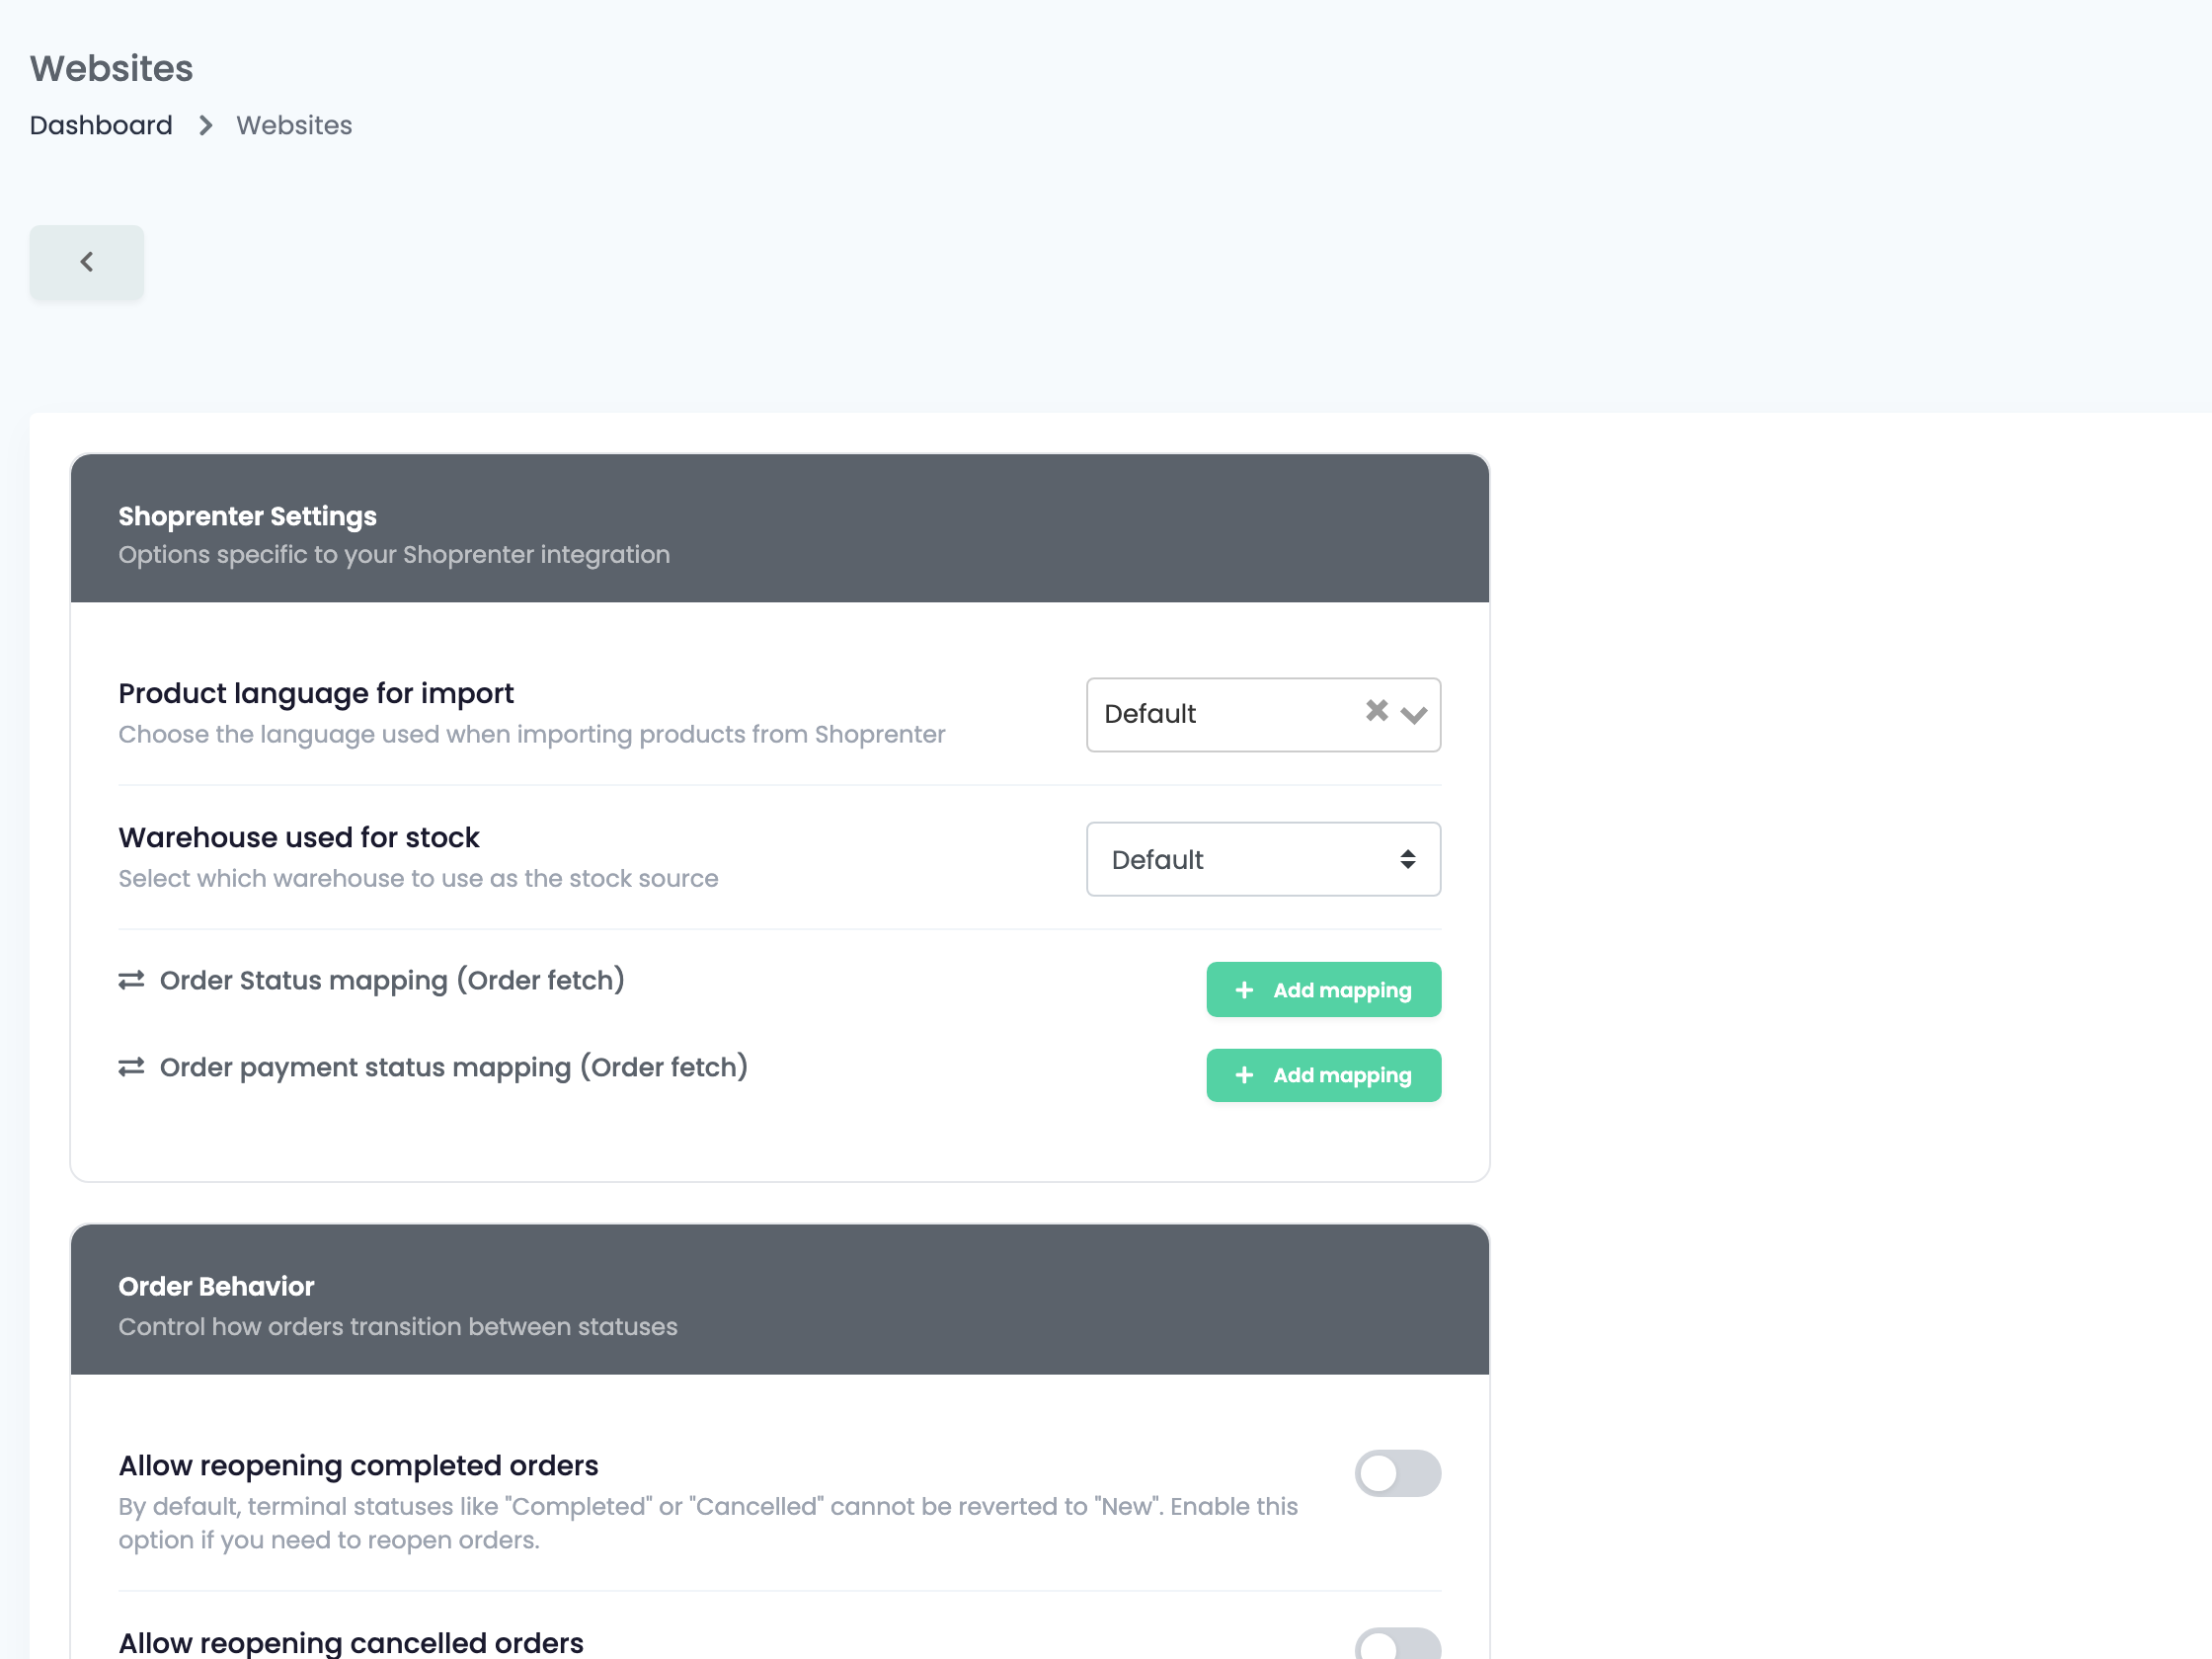
| Setting | What it does |
|---|---|
| Product language for import | Which of the shop's languages the product names and descriptions are read in. A Shoprenter shop is often multilingual, and this decides which version reaches your marketplaces. |
| Warehouse used for stock | Which of Shoprenter's four stock fields is read. Default adds all four together. |
| Order Status mapping | Turns a Shoprenter order status into an easySales one when orders are fetched. Add one line per status you use. |
| Order payment status mapping | The same for the payment status. |
Where stock actually comes from
Shoprenter keeps four separate stock fields on every product. This is the setting most worth understanding, because the default is not "the first one".
What comes across with a product
| From Shoprenter | Into easySales |
|---|---|
| Product name and description, in the language you chose | Name and description |
| Meta description and short description | Extra descriptions, kept alongside the main one |
| SKU and GTIN | SKU and EAN |
| Manufacturer | Brand |
| Price and tax class | Price with VAT worked out from the class; an active special price wins over the list price |
| Stock fields | One stock figure, per the warehouse setting |
| Weight, images, categories and attributes | The same, as product characteristics |
A product with variants is imported as a parent and its children, so the variants stay grouped rather than arriving as unrelated products.
After the shop is connected
The shop now has a card of its own on Integrations → Websites, with its API address, its website token and a badge saying the connection works.
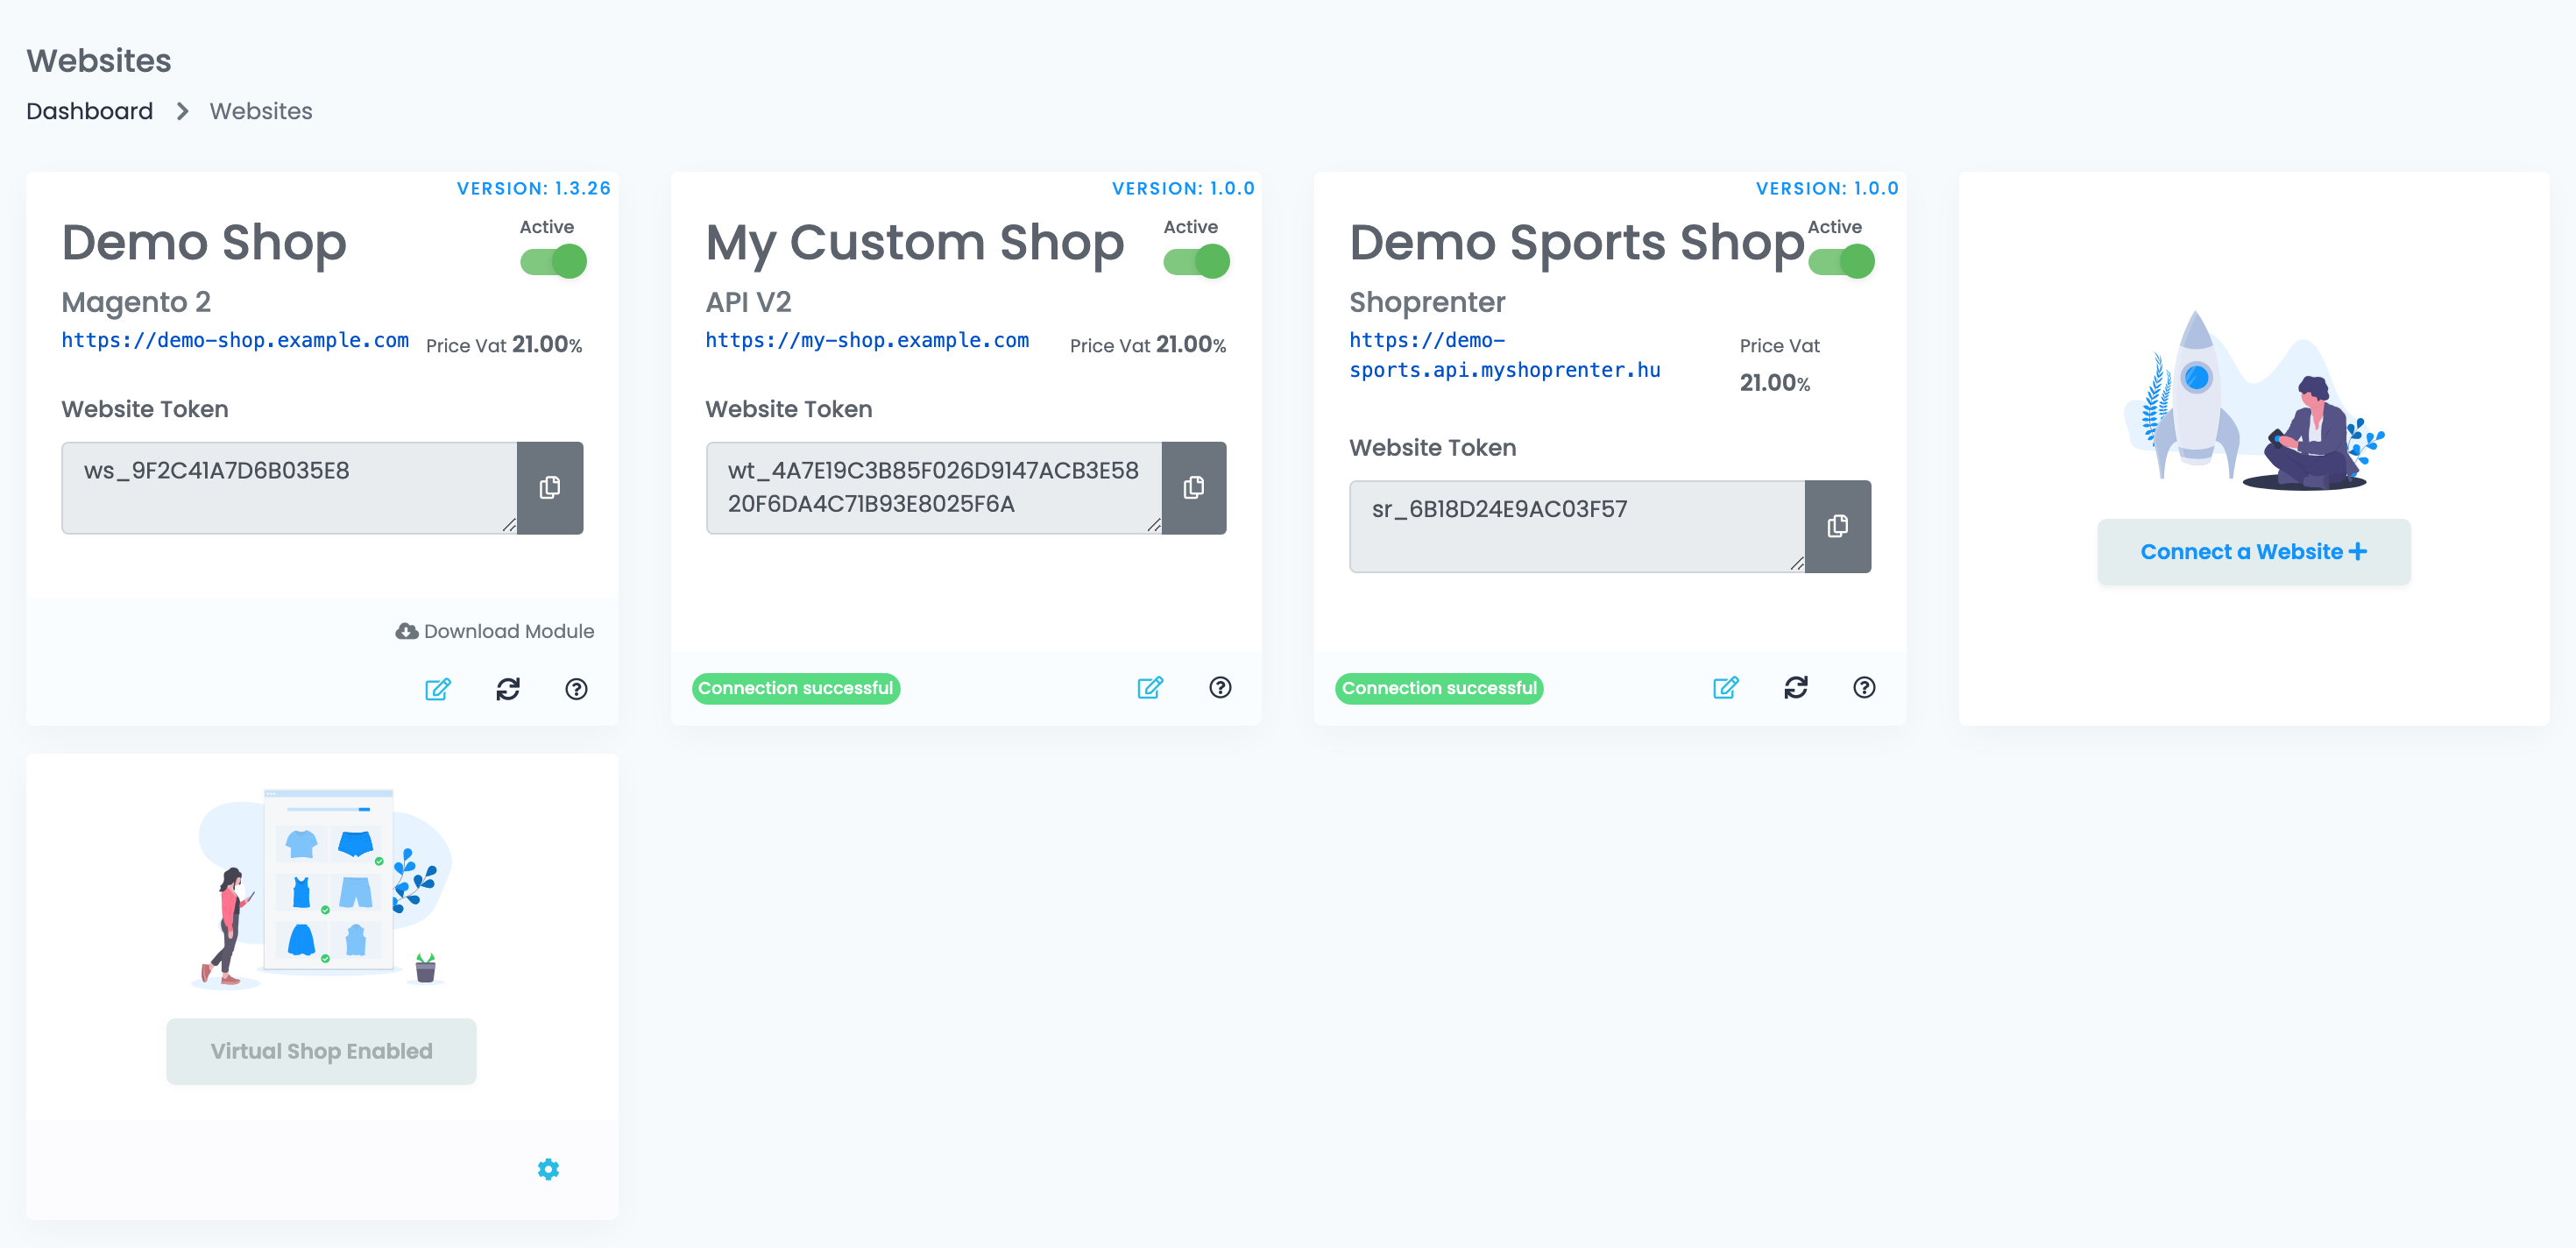
The pencil on that card opens the settings you saved.
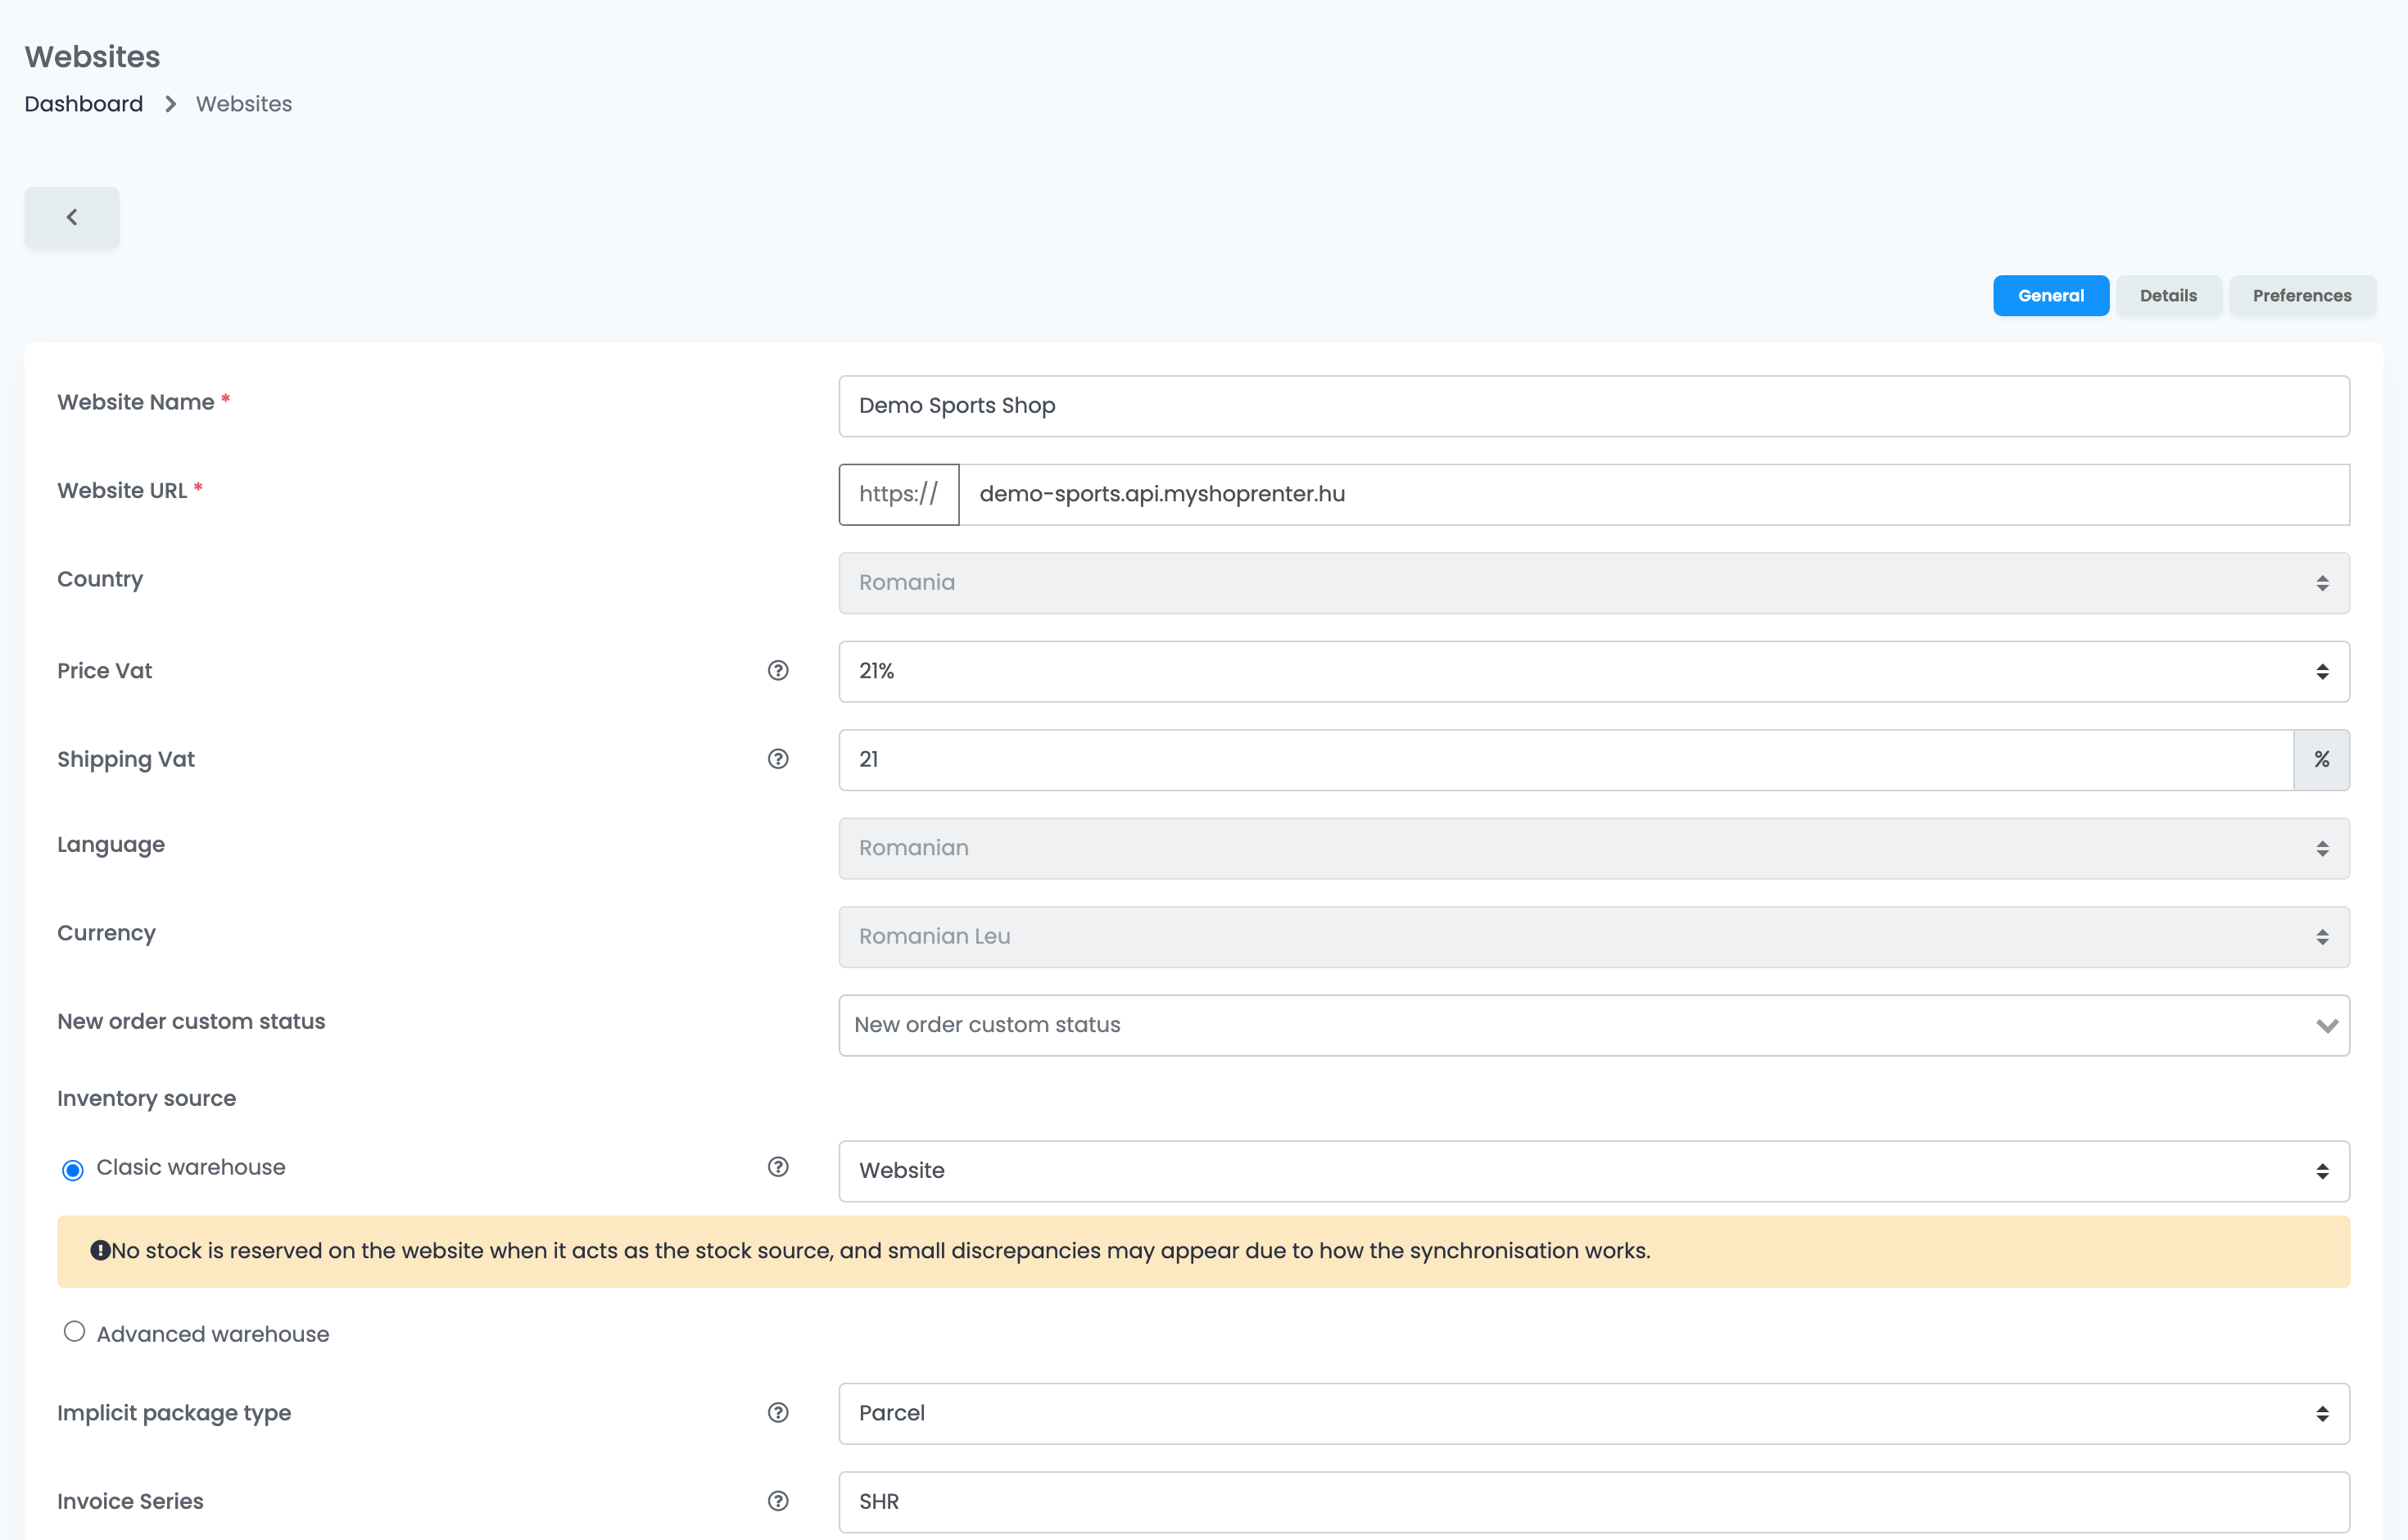
Country, language and currency are fixed once the connection is saved — they describe the shop, and changing them would re-price everything already imported. Everything else on this screen can still be edited.
If you remove the app from Shoprenter
Uninstalling the easySales app in Shoprenter switches the connection off rather than deleting it. The shop stops syncing and its card goes inactive, but its settings, its products and its orders stay where they are. Install the app again and switch the shop back on to resume.